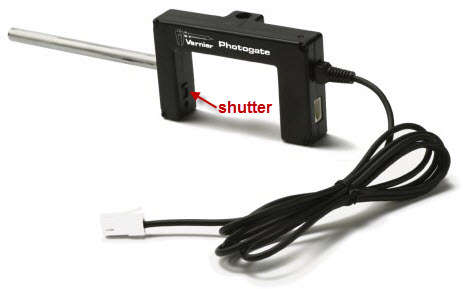
Check the position of the sliding shutter on the inside of the photogate. Since the shutter is black, it is easy to miss its position. The shutter slides back and forth to block the phototransistor on the inside of the gate. If the inside of the gate is blocked (shutter is towards the outside of the gate), the photogate is in laser switch mode and the red LED will stay on all the time unless a laser is striking the phototransistor on the outside of the photogate. When the switch is towards the inside of the gate, the LED should only come on when the an object is inside the photogate and blocking the beam.
Note that this only affects post July ’03 BTD-style photogates where one side of the photogate is thicker than the other.
Another problem that can keep photogates from working is a short in the BTD socket. Look in the white BTD socket on the gate; you’ll see six flat wires. If any are touching, they need to be separated. You can bend them slightly with a small screwdriver.
If these things don’t help, check that you are using the right cable. The connection is from the six-conductor clear plastic phone-style connector on the photogate end to the flat white BTD connector on the interface end. Note that you cannot use a motion detector cable, which will fit into the white BTD socket on the photogate and then run to the interface. If you use a four-conductor cable from an old photogate, the autoID function of the new gate will not work. The white BTD socket on the gate is used ONLY for daisy-chain setup from one photogate to another.