

One possible cause for a high initial velocity is the detection of the leading edge of the picket fence as it passes through a photogate. This is likely to happen if the edge of picket fence is marked or scratched from repeated drops or improper storage. This can also happen for new picket fences if the picket fence passes through the photogate too close to the photodiodes. You can test for this issue by watching the indicator LEDs and observing whether they light when the leading edge of the picket fence passes through the gate.
Here are some things you can do to lessen the chance that this will happen.
- Don’t allow the picket fence to strike hard surfaces when using it. Use something to cushion the collision with other things. A towel is usually sufficient.
- Store the picket fence so it is protected from getting scratched or damaged by other items.
- If your picket fence gets marked up, replace it.
Picket Fence (PF)
Cart Picket Fence (PF-CART) - Firmly mount the photogate on a bracket or on a support rod. Don’t hold the photogate in your hand during data collection.
- Reduce the likelihood the picket fence will tilt or rotate while passing through the photogate.
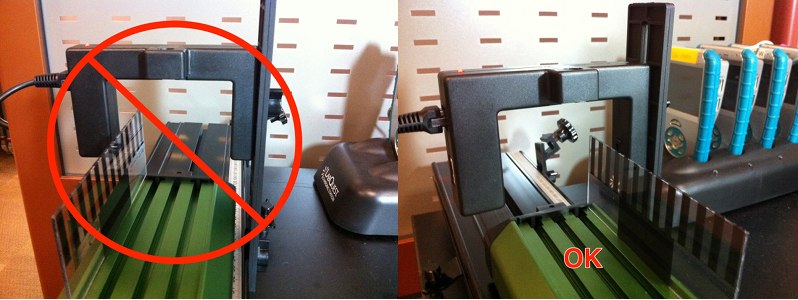
- When using a Cart Picket Fence, place the picket fence on the cart so the picket fence is farther away from the photodiode side of the photogate (closer to the infrared LED side). See the image below for the Vernier Photogate.
Vernier Photogate – the internal photodiode is located on the arm to which the photogate cable attaches.
Photogate (VPG-BTD)
Go Direct Photogate – the internal photodiodes are located on the arm to which the accessory rod or photogate bracket attaches. (Note: this is not the arm to which the cable attaches.)
Go Direct® Photogate (GDX-VPG)
See also:
How can I use a Vernier Photogate to measure g?
Why does the Cart Picket Fence edge get detected by a photogate?