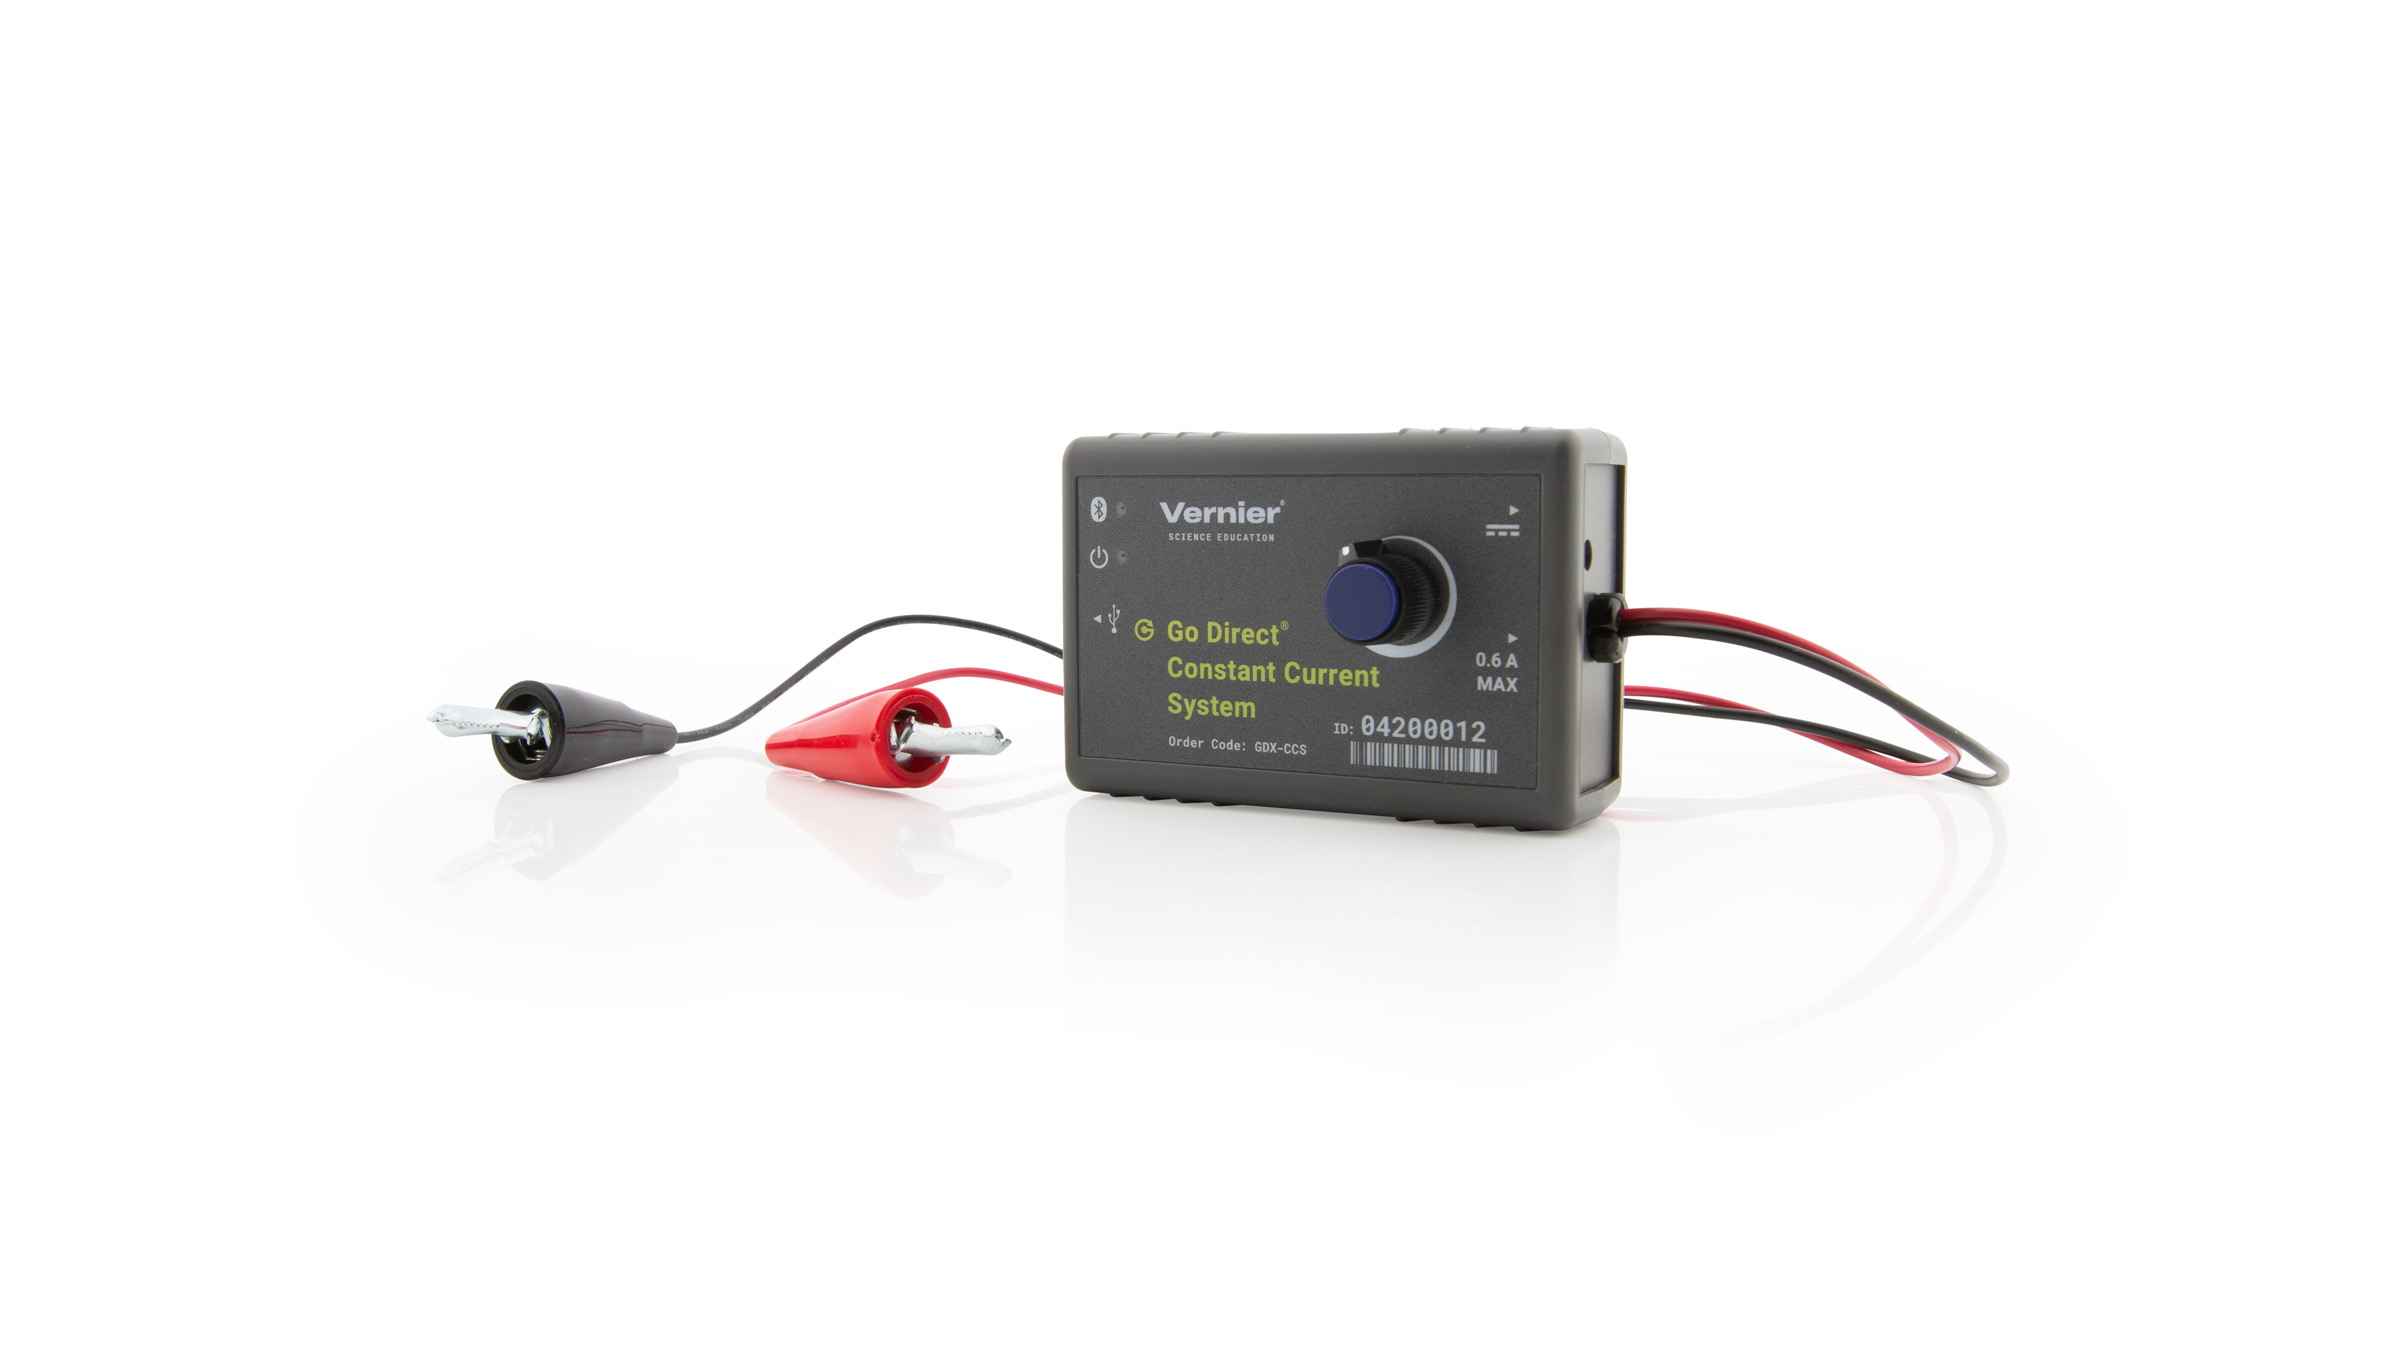
Troubleshooting
Primary Test:
- Connect the AC power adapter to the Constant Current System.
- Connect your sensor as described in the Getting Started instructions for your device. (The green LED will flash to indicate the sensor is connected.)
- Be sure the dial is turned counterclockwise to the minimum.
- Connect the red and black clips together.
- Turn the dial clockwise. The current reading should increase to 0.6 A when the dial is turned to the maximum.
Additional Troubleshooting
- Do you have updated instructions for Advanced Chemistry with Vernier Experiment 21, Electroplating?
- Do you have a power supply for electrolysis?
- Go Direct sensor does not connect to LabQuest 2 via Bluetooth.
- Troubleshooting Bluetooth Connections with Go Direct Sensors
- What can I do if a Go Direct sensor's Bluetooth LED flashes red and green when I try to connect to it and the connection fails?
- Will my device work with Go Direct Sensors via Bluetooth?
- How do I know if my LabQuest will work with Go Direct Sensors and Go Wireless devices?
Specifications
- Range: 0 to 0.6 A
- Linearity: 0.1%
- Supply voltage: 5 VDC
- Supply current (typical): 9 mA
- Output voltage range: 0 to 5 V
- Transfer function: Vout = 6.9(I) + 0
- Power Supply
⚬ Input: 100–240 Volts AC; 50/60 Hz; 0.5 A; 26–41 VA
⚬ Output: 5 V, 1.5 A (Center positive) - Dimensions: 9 cm length, 6 cm height, 5 cm depth, leads: 60 cm long
- Connections:
⚬ Wireless: Bluetooth® v4.2 (wireless range 30 m unobstructed)
⚬ Wired: USB 2.0 full speed
Calibration
Calibrate? No. The sensor is set to the stored calibration before shipping and cannot be calibrated by the user.
Related Products
- Micro USB to USB-C Cable (CB-USB-C-MICRO)
- Electrode Support (ESUP)
- Constant Current System (CCS-BTA)
Replacement Parts
- LabQuest® Power Supply (LQ3-PS)
- Micro USB Cable (CB-USB-MICRO)