Independence of Motion Accessory User Manual
Order Code: IOM-VPL
The Independence of Motion Accessory is for use with the Go Direct® Projectile Launcher (GDX-PL) or the Vernier Projectile Launcher (VPL). It cannot be used alone or with any other device. These instructions assume that you are familiar with the operation of our projectile launchers.
The Independence of Motion Accessory enables a projectile launcher to perform the classic experiment where one ball is dropped as another is projected horizontally to determine if the balls strike the floor simultaneously.
Note: Vernier products are designed for educational use. Our products are not designed nor recommended for any industrial, medical, or commercial process such as life support, patient diagnosis, control of a manufacturing process, or industrial testing of any kind.
What's Included
- Independence of Motion Accessory
- Solid steel balls (2)
- Drilled steel balls (2)
- Solid plastic balls (2)
- Drilled plastic balls (2)
Using the Product
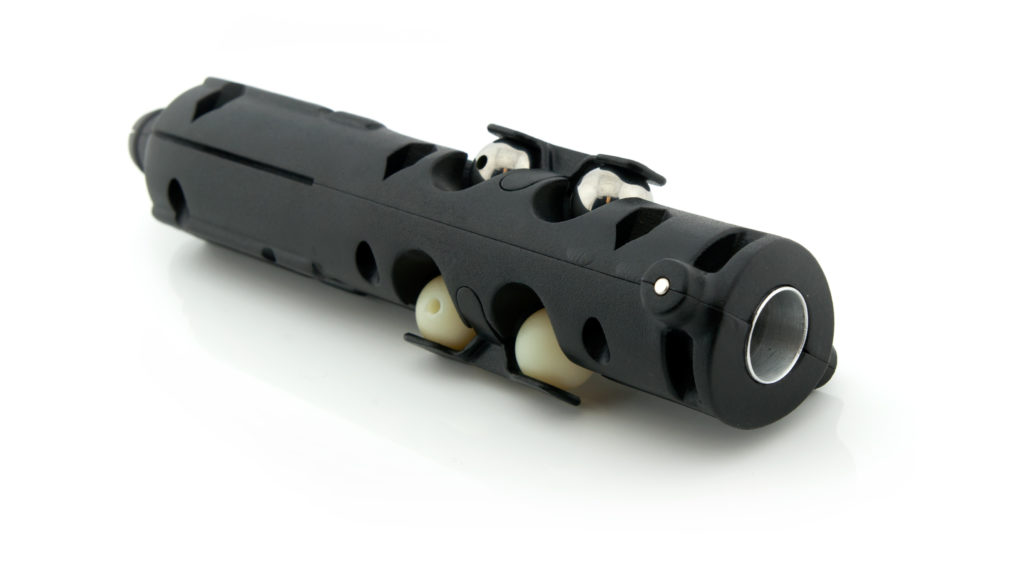
The Independence of Motion Accessory uses the air pressure from a projectile launcher to fire projectiles a short distance horizontally, while simultaneously releasing a second ball that falls vertically.
Set up the Independence of Motion Accessory (IOM) using these steps:
- Configure the projectile launcher so that the barrel is approximately horizontal. Insert the IOM into the barrel of the projectile launcher. The bubble level on the IOM must be on top.
- Push the IOM firmly into the projectile launcher so that the aluminum barrel is not visible.
- Insert the cotter pin below the projectile launcher barrel to remove all possibility of the IOM being ejected from the projectile launcher when fired.
- Position the projectile launcher so that the IOM extends over the edge of the table and so that the IOM is horizontal as judged by the bubble level on the IOM.
- Prepare the launcher for firing by providing power and pressurizing the air chamber per standard operating instructions for the projectile launcher.
- Insert a solid ball into the axial chamber. Note that the pin extends to the side.
- Place a drilled ball on the pin.
- Fire the launcher and listen for the impact of the balls to determine if they strike the floor simultaneously.
Safety
Always use the included cotter pin to secure the Independence of Motion Accessory to the launcher.
We recommend students and instructors wear goggles at all times while using this product, including anyone in the vicinity of the projectile launch and landing areas.
The launching system of the projectile launcher requires simultaneous engagement of the “Arm” and “Launch” buttons to prevent accidental launches. Do not attempt to override or disable this feature.
Other safety considerations
- Do not put your face, hands, or other body parts near the end of the launch chamber while launching.
- Do not aim the launcher at a person or animal.
- Only apply pressure to the launcher using the pump provided.
- Do not exceed 150 psi when pressurizing the launch chamber.
Care and Maintenance
Do not store the launcher (with or without the Independence of Motion Accessory attached) while the launcher is pressurized.
The steel balls are not stainless steel and can corrode over time when exposed to warm, humid environments. To reduce the likelihood of corrosion, keep the balls sealed in an airtight container such as a zipper-closure bag. In very humid environments, consider including a desiccant packet in with the balls.
If the steel balls do corrode, they will need to be replaced. Do not use any kind of oil on the balls in an attempt to remove the corrosion, as oil can damage the launcher.
How the Accessory Works
One solid ball is placed in the Independence of Motion Accessory barrel, which causes a pin to extend. A second, drilled ball is placed on the extended pin. When the projectile launcher fires, the solid ball is projected horizontally out of the device. As the ball leaves the chamber, the pin holding the drilled ball will retract and allow that ball to fall vertically.
Note: The IOM cannot be used with the projectile launcher’s photogate timing capabilities or a connected Time of Flight Pad. This is because the IOM accessory blocks the internal photogates, which renders the Accessory (EXT. SWITCH) port on the launcher unusable.
Sample Experiments
There are several factors you can vary to determine their effect on the independence of motion.
Horizontal Velocity Variation
Do the two balls strike the floor simultaneously, even for different horizontal velocities, or for differing horizontal distances traveled? Change the horizontal velocity by changing the launcher air pressure.
Different Mass Variation
Does the simultaneity depend on the mass of the balls? Try the experiment with the plastic balls.
Vertical Fall Variation
Do the two balls strike the floor simultaneously, even if the drop height is much larger? Place the launcher at different heights.
Vertical Velocity Variation
Do the two balls now strike the floor simultaneously if the Independence of Motion Accessory is not horizontal? Why or why not? Set the launch angle to some other angle and explore.
Troubleshooting
For troubleshooting and FAQs, see www.vernier.com/til/3299
Accessories/Replacements
|
Item |
Order Code |
|---|---|
|
GDX-PL |
|
|
VPL |
|
|
PS-VPL |
|
|
IOM-BLS |
Warranty
Vernier warrants this product to be free from defects in materials and workmanship for a period of five years from the date of shipment to the customer. This warranty does not cover damage to the product caused by abuse or improper use.
Contact Support
Fill out our online support form or call us toll-free at 1-888-837-6437.