Note: If you have attempted to set this up before finding this article, you may have some leftover settings that will interfere with the configuration. For a clean start, choose File > New to start a new activity. Be sure to follow all of these steps.
- Connect the Go Direct® Photogate (
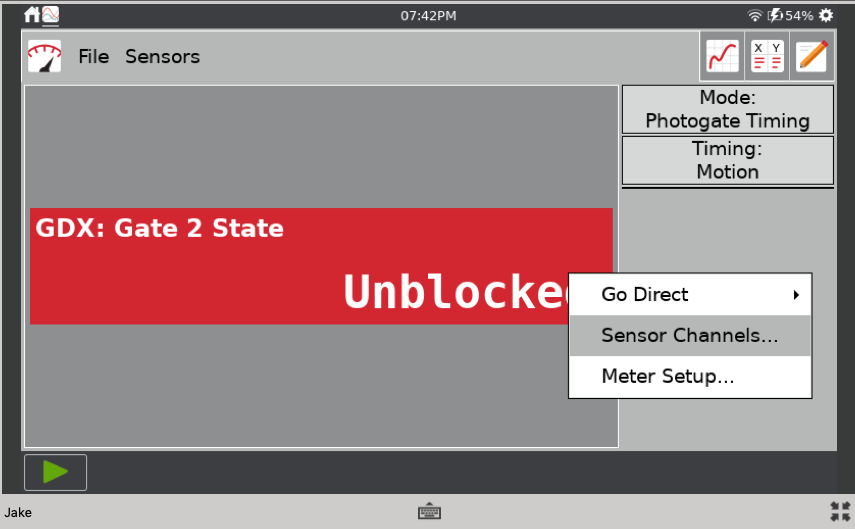
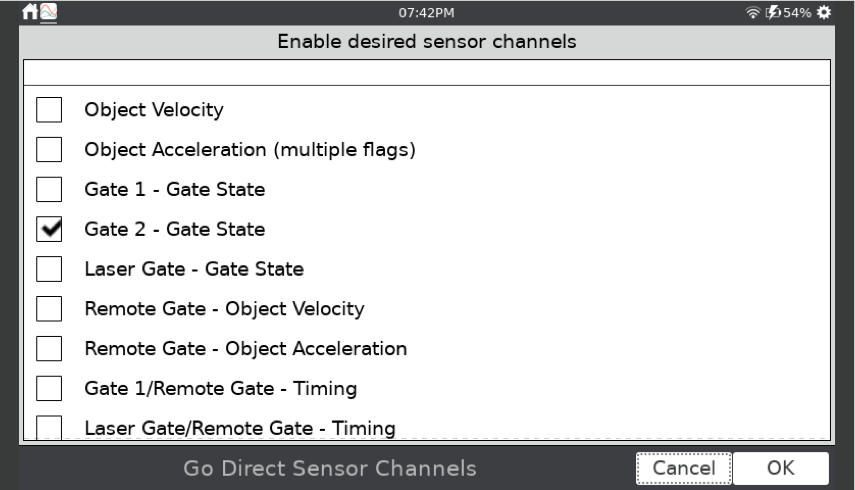
GDX-VPG ) to the LabQuest, either via USB cable or wirelessly. - Tap on the live readout of the photogate state and select “Sensor Channels.” Check the “Gate 2 – Gate State” option; uncheck any other options. Each Go Direct photogate has two internal photogates, but only Gate 2 is blocked by the pulley.
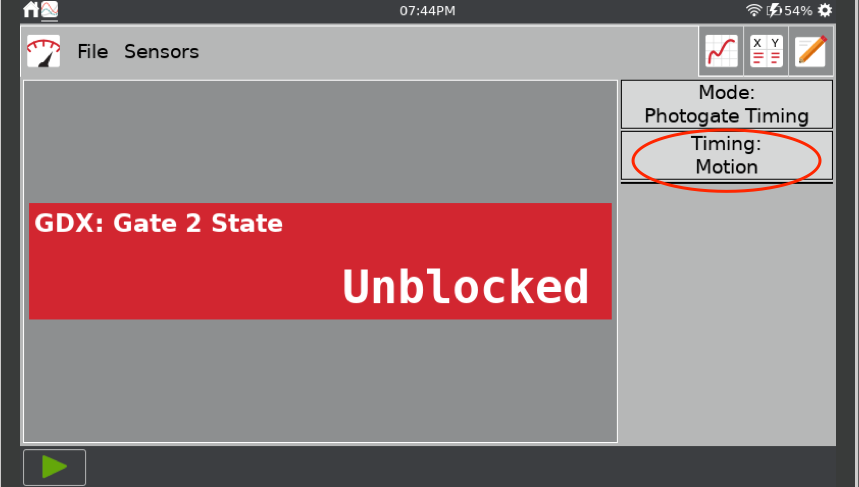
- Tap on the “Timing: Motion” section on the right-hand side of the Meter screen to bring up the photogate modes.
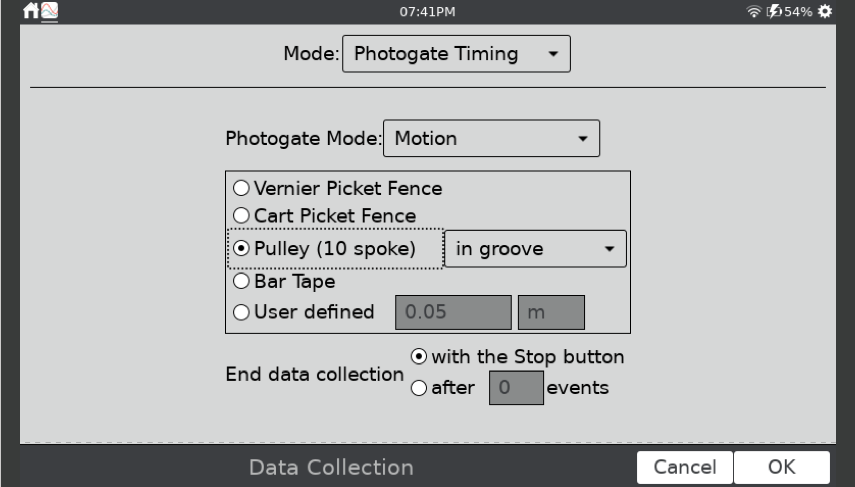
- In the Photogate Mode section, select Pulley. Most new pulleys, like our Ultra Pulley, have 10 spokes. And for an Atwood’s machine, the string is usually in the groove. Verify that those options are selected.
You are now ready for data collection! Hang the masses and tap Collect to capture motion data.
Related: How do I attach a Photogate and Ultra Pulley to the end of a Vernier Track?