The following guide pertains to setting up wired Vernier (BTD) Photogates for data collection in a projectile motion experiment.
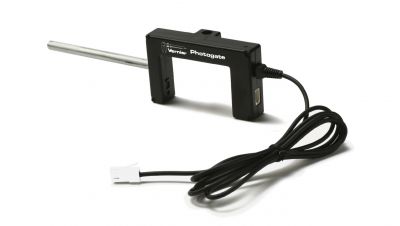
Photogate (
If you are looking for instructions for setting up a Go Direct Photogate, see
How do I set up Go Direct Photogate for data collection in a projectile motion experiment?
If you would like general photogate set up help, see
- How do I set up wired Vernier Photogates (VPG-BTD) for data collection with Logger Pro 3?
- How do I set up wired Vernier Photogates (VPG-BTD) for data collection using LabQuest App?
- How do I set up wired Vernier Photogates (VPG-BTD) for data collection using Graphical Analysis and Graphical Analysis Pro?
Doing a Vernier Experiment?
If you are doing the projectile motion experiment from Physics with Vernier, instructions for how to set up the photogates are in the student files. Choose the document from the folder that matches the software you are using (e.g., Graphical Analysis, LabQuest App, Logger Pro).
Writing Your Own Experiment?
If you are writing your own projectile motion experiment, you will need to set the photogate mode and enter the correct distance/length to get meaningful data. Below is an outline for some common data-collection set ups to operate the photogates.
Launch velocity from a horizontal table top
- Setup: Two Photogates
- Photogate Mode
- Graphical Analysis: Speed Through Gate – Gate Separation
- LabQuest App: Pulse
- Logger Pro file: Pulse Timer – Two Gates.cmbl
- Distance (or Length): Distance between photogates
Set up two photogates so that the projectile will pass through both of them just before leaving the table top. Measure the distance between the gates. Test data collection by pressing Collect and placing a finger in the first photogate and then the second. Check the data table to verify that the events were recorded and that the velocity was calculated correctly.
Timing starts when the object breaks the beam of the first photogate and ends when it breaks the beam of the second photogate. The launch speed of the object is determined by dividing the distance between the photogates by the measured time.
Launch velocity from an angled track
- Setup: Single Photogate
- Photogate Mode
- Graphical Analysis: Speed Through Gate – Object/Flag Width
- LabQuest App: Gate
- Logger Pro file: One Gate Timer.cmbl
- Distance (or Length): Length/diameter of the projectile that will pass through the photogate
When the projectile passes through the photogate, it measures how long the beam is blocked. The object’s speed (at the position of the photogate) is determined by dividing the length of the object by the blocked time. Measure the length of the projectile that will pass through photogate. Set up a single photogate near the end of the angled track so that the projectile moves through it just before launch. Test data collection by pressing Collect and swiping a finger through the photogate. Check the data table to verify that the events were recorded and that the velocity was calculated correctly.
Time of flight from a horizontal table top with Vernier Time of Flight Pad
- Setup: Single Photogate and Time of Flight Pad
- Photogate Mode
- Graphical Analysis: Speed Through Gate – Gate Separation
- LabQuest App: Pulse
- Logger Pro file: Pulse Timer – Two Gates.cmbl
- Distance (or Length): 0 (disregard velocity measurements)
When the projectile passes through the first photogate, timing begins. When the projectile strikes the Time of Flight Pad, timing stops. Set up a single photogate at the end of the horizontal table top at a point just before it leaves the end. Daisy-chain the Time of Flight Pad into the photogate. Test data collection by pressing Collect and swiping a finger through the photogate. Then, press the Time of Flight Pad firmly. Check the data table to verify that the events were recorded and that the recorded time is correct.
Further Information
- The user manuals for the Vernier Projectile Launcher (
VPL ), Go Direct® Projectile Launcher (GDX-PL ), and Time of Flight Pad (TOF-VPL ) contain helpful usage tips and guidelines. - Graphical Analysis App and LabQuest App (v2.8.4 or newer) includes a Projectile Launcher Photogate timing mode.
- This is the default timing mode when using the Vernier Projectile Launcher or the Go Direct Projectile Launcher.
- You can use two Vernier BTD photogates and optional Time of Flight Pad with the Projectile Launcher timing mode as long as the photogates and Time of Flight Pad are all daisy-chained together.
- The Logger Pro Experiments/Probes & Sensors/Projectile Launcher folder includes the following experiment files:
- Angle Range.cmbl – This experiment file provides a template for an exploration of how the horizontal range of a projectile changes with launch angle.
- Projectile Launcher.cmbl – This experiment file is a generic template for experiments using the Projectile Launcher and is set up to measure and record launch velocity.
- Time of Flight.cmbl – Like Projectile Launcher.cmbl, this experiment file is set up for the Projectile Launcher when it is used with the Time of Flight accessory.