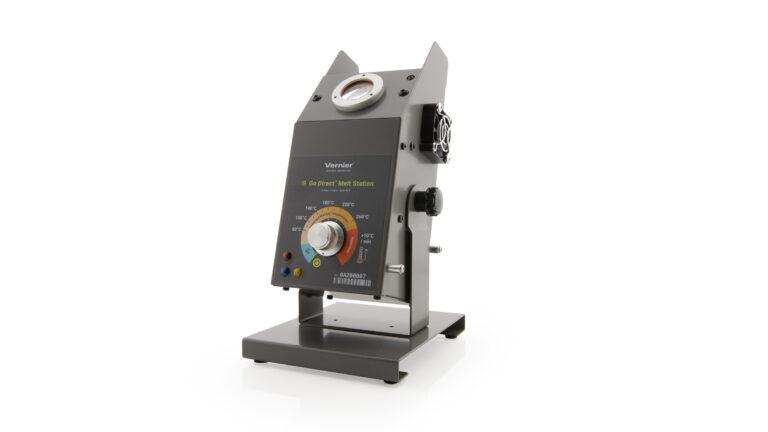
Troubleshooting
Primary Test:
- Plug in the Melt Station using its AC adapter.
- Turn the control dial to any temperature setting, including Rapid Heat.
- Connect your sensor as described in the Getting Started instructions for your device. (The green LED will flash to indicate the sensor is connected.)
- The Melt Station should automatically be identified, and a temperature reading will appear.
- Click Collect to begin data collection.
- The temperature reading should steadily increase as the heating block warms up.
Marking Data Points During Data Collection
If you want to record specific points during the test:
⚬ LabQuest App
▸Tap Keep at key moments to capture data points.
▸Tap the entry box to the right of the graph. Enter text in the field provided.
⚬ Graphical Analysis Pro
▸Click or tap MARK to log a data point.
▸Click or tap the box next to the MARK to add a description.
⚬ Graphical Analysis (free version)
▸Click or tap a point to select it.
▸Click or tap Graph Options, select Add Annotation, and enter text in the field provided.
Additional Troubleshooting
- The control knob on my Melt Station is loose. How can I tighten it?
- How do I remove a broken capillary tube from a Melt Station?
- Go Direct sensor does not connect to LabQuest 2 via Bluetooth.
- Troubleshooting Bluetooth Connections with Go Direct Sensors
- What can I do if a Go Direct sensor's Bluetooth LED flashes red and green when I try to connect to it and the connection fails?
- Will my device work with Go Direct Sensors via Bluetooth?
- How do I know if my LabQuest will work with Go Direct Sensors and Go Wireless devices?
Specifications
- Temperature Sensor: Class A, Platinum Resistance Temperature Detector (RTD)
- Range: Ambient to 260°C
- Resolution: 0.10°C
- Accuracy: ±(0.31+0.0006∙T), where T is the temperature in Celsius
⚬ Typical values: ±0.4°C (<200°C); ±0.5 deg C (>200°C) - Safety shut down: The heating block is automatically powered down after approximately 60 minutes of heating.
- Capillary tubes: 1.4–1.8 mm outside diameter, 100 mm length
- Capillary tube slots: 3
- Viewing lens: 27 mm diameter (functional), 30 mm (actual)
- Lighting of capillary slots: 3 white LEDs
- Lighting of control dial:
⚬ Red LED (indicates heating mode)
⚬ Blue LED (indicates cooling mode with cooling fan running)
⚬ Yellow LED (safety shut off activated) - Dimensions
⚬ Base: 13 cm × 15 cm × 1.5 cm
⚬ Body: 9 cm × 9 cm × 24 cm - Weight: 1.0 kg (2.2 lbs); with AC adapter: 1.2 kg (2.6 lbs)
- Power Supply
⚬ universal AC adapter 100–240 VAC, 50–60 Hz input
⚬ Output: 24VDC to unit
⚬ Power consumption: 40W max., <0.5A @ 110V - Connections
⚬ Wireless: Bluetooth® v4.2 (wireless range 30 m unobstructed)
⚬ Wired: USB 2.0 full speed
Calibration
Calibrate? No. The temperature sensor embedded in the aluminum heating block of the Melt Station will never need to be calibrated. The sensor is carefully calibrated before it ships, and this unique calibration is stored on a smart chip in the sensor. Note: There is no method to perform a calibration of this sensor in any of our software programs.
Related Products
- Micro USB to USB-C Cable (
CB-USB-C-MICRO ) - Melt Station (
MLT-BTA )
Replacement Parts
- Melt Station Capillary Tubes (
MLT-TUBE ) - Replacement Melt Station Power Supply (
MLT-PS ) - Micro USB Cable (
CB-USB-MICRO )

