Go Direct® Platinum-Cell Conductivity Probe User Manual
Order Code: GDX-CONPT
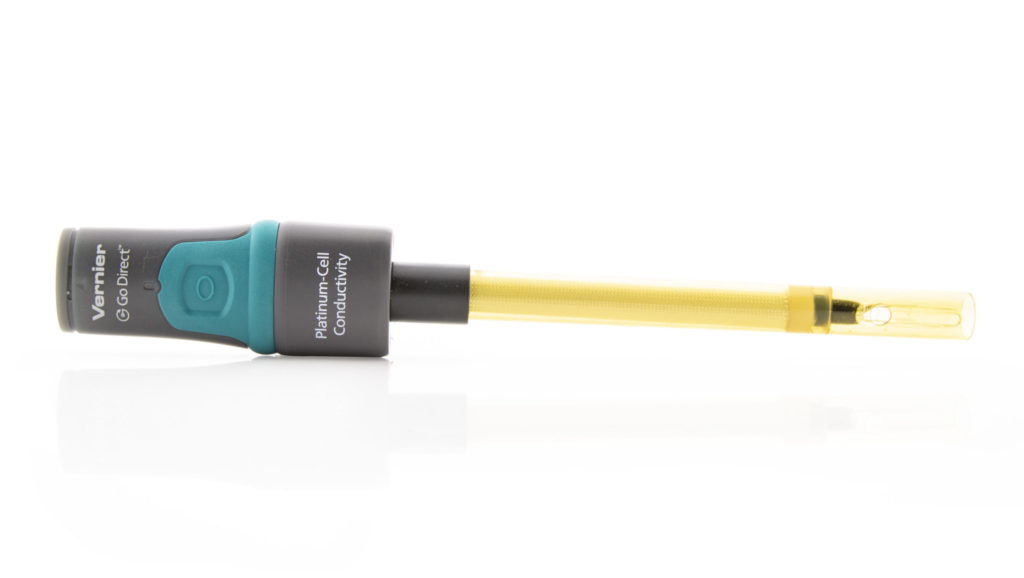
Perfect for AP Chemistry and college general chemistry, Go Direct Platinum-Cell Conductivity provides an accurate and easy measurement of a solution’s conductivity or its total ion concentration. The platinum-cell sensing element provides high accuracy and chemical compatibility when measuring non-aqueous solutions, strong acids, and strong bases. This probe connects via Bluetooth® wireless technology or via USB to your device.
Note: Vernier products are designed for educational use. Our products are not designed nor are they recommended for any industrial, medical, or commercial process such as life support, patient diagnosis, control of a manufacturing process, or industrial testing of any kind.
What's Included
- Go Direct Platinum-Cell Conductivity
- Micro USB Cable
Compatible Software
Choose a platform below to see its compatibility requirements.LabQuest
Interface LabQuest App LabQuest 3 Full support LabQuest 2 Full support 1 LabQuest Incompatible Compatibility Notes
Computers
Software Interface Graphical Analysis Graphical Analysis (Web App) No interface required Full support Full support LabQuest 3 Full support 1 Incompatible LabQuest 2 Full support 1 2 Incompatible Compatibility Notes
Chromebook
Software Interface Graphical Analysis (Web App) No interface required Full support iOS
Software Interface Graphical Analysis Graphical Analysis GW No interface required Full support Incompatible LabQuest 3 Full support Full support LabQuest 2 Full support 1 Full support 1 Compatibility Notes
Android
Software Interface Graphical Analysis Graphical Analysis GW No interface required Full support Incompatible LabQuest 3 Full support Full support LabQuest 2 Full support 1 Full support 1 Compatibility Notes
Python
Software Interface Python No interface required Full support Javascript
Software Interface Javascript No interface required Full support LabVIEW
Software Interface NI LabVIEW No interface required Full support
Quick Start: Vernier Graphical Analysis® and Bluetooth®
- Charge your sensor for at least 2 hours before first use.
- Turn on your sensor. The LED will blink red.
- Launch Graphical Analysis, then click Sensor Data Collection.
- Select your sensor from the list. The sensor ID is located on the sensor label near the bar code. Note: If you don’t see a list of available sensors, click WIRELESS. After selecting your sensor, click Pair.
- This is a multi-channel sensor. Click SENSOR CHANNELS and select the channel(s) you want to use.
- Click DONE. You are now ready to collect data.
Using other Vernier data-collection apps or want to connect via USB?
Visit www.vernier.com/start-go-direct
Note: This sensor also works with LabQuest 2 and LabQuest 3; it does not work with the original LabQuest.
Charging the Sensor
Connect Go Direct Platinum-Cell Conductivity to the included Micro USB Cable and any USB device for two hours.
You can also charge up to eight Go Direct Platinum-Cell Conductivity Probes using our Go Direct Charge Station, sold separately (order code: GDX-CRG).
| Charging |
Blue LED is on steady while sensor is connected to the Charging Cable or Charge Station. |
| Fully charged |
Blue LED is off when charging is complete. |
Powering the Sensor
| Turning on the sensor |
Press button once. Red LED indicator flashes when unit is on. |
| Putting the sensor in sleep mode |
Press and hold button for more than three seconds to put into sleep mode. Red LED indicator stops flashing when sleeping. |
Connecting the Sensor
See the following link for up-to-date connection information:
www.vernier.com/start/gdx-conpt
| Connected and charging | Blue and Green LED are solid when sensor is connected to Graphical Analysis via USB and unit is charging. (Green LED is obscured by the blue one.) |
| Connected, fully charged | Green LED is solid when sensor is connected to Graphical Analysis via USB and the unit is fully charged. |
| Charging via USB, connected via Bluetooth |
Blue LED is solid and green LED is flashing, but the green flashing LED looks white because it is overwhelmed by the blue. |
Identifying the Sensor
When two or more sensors are connected, the sensors can be identified by tapping or clicking Identify in Sensor Information.
Using the Product
- Thoroughly rinse the lower section of the probe using distilled or deionized water.
- Connect the sensor following the steps in the Quick Start section of this user manual. Note: Given the nature of the platinum-cell electrode, a one-point calibration is strongly recommended prior to use.
- When you are finished making measurements, rinse the electrode with distilled water. Store dry.
Note: Go Direct Platinum-Cell Conductivity has three sensor channels. By default, the probe measures temperature compensated conductivity. The other two channels are temperature and non-temperature compensated conductivity.
Channels
Go Direct Platinum-Cell Conductivity has three measurement channels:
- Conductivity
- Conductivity zero percent (non-temperature compensated conductivity)
- Temperature
Calibrating the Sensor
For the most accurate measurements with this sensor, we recommend a one-point calibration. It is a simple process that takes only a few minutes. For additional calibration information, see www.vernier.com/til/4011
To calibrate the sensor in Graphical Analysis, complete the following steps.
- Click or tap the sensor meter to view sensor options.
- Select Calibrate and follow the applicable prompts on the Calibrate Sensor screen.
In order to calibrate Go Direct Platinum-Cell Conductivity, or to confirm that a saved calibration is accurate, you should have a supply of conductivity standard solutions that cover the range of the conductivity values you will be measuring. For more information about conductivity standard solutions, including recipes for preparation, see www.vernier.com/til/760
Once you have calibrated a Go Direct sensor, the calibration is automatically stored to the sensor and will be used each time you connect to your device. You can always choose to restore factory defaults if you feel the custom calibration is invalid.
To restore factory defaults in Graphical Analysis, complete the following steps.
- Click or tap the live readouts meter and choose Calibrate.
- Click or tap Reset Calibration.
- A window will appear warning you that you are about to reset the calibration. Choose Reset Calibration.
Specifications
|
Range |
0 to 20,000 µS/cm (0 to 10,000 mg/L TDS) |
|
Type |
Epoxy body, 2-cell platinum element electrode |
|
Response time |
95% of final reading in 5 seconds |
|
Temperature compensation |
Optional: 2% from 5°C to 35°C or none |
|
Temperature range |
0 to 80°C |
|
Accuracy |
±10 μS/cm (valid for 1–4,000 μS/cm with custom one‑point calibration at 1413 μS/cm) |
|
Resolution |
0.01 μS/cm |
|
Cell constant |
1.0 cm–1 |
|
Wireless specification |
Bluetooth 4.2 |
|
Maximum wireless range |
30 m |
|
Dimensions |
12 mm OD × 120 mm shaft length |
|
Battery |
300 mA Li-Poly |
|
Battery life (single full charge) |
~24 hours |
|
Battery life (long term) |
~500 full charge cycles (several years depending on usage) |
Care and Maintenance
When you have finished using Go Direct Platinum-Cell Conductivity, simply rinse it off with distilled water and blot it dry using a paper towel or lab wipe. The probe can then be stored dry.
If the probe cell surface is contaminated, soak it in water with a mild detergent for 15 minutes. Then soak it in a dilute acid solution (0.1 M hydrochloric acid or 0.5 M acetic acid works well) for another 15 minutes. Then rinse it well with distilled water. Important: Avoid scratching the inside electrode surfaces of the elongated cell.
Battery Information
Go Direct Platinum-Cell Conductivity contains a small lithium-ion battery in the handle. The system is designed to consume very little power and not put heavy demands on the battery. Although the battery is warranted for one year, the expected battery life should be several years. Replacement batteries are available from Vernier (order code: GDX-BAT-300)
Storage and Maintenance
To store Go Direct Platinum-Cell Conductivity for extended periods of time, put the device in sleep mode by holding the button down for at least three seconds. The red LED will stop flashing to show that the unit is in sleep mode. Over several months, the battery will discharge but will not be damaged. After such storage, charge the device for a few hours, and the unit will be ready to go.
Exposing the battery to temperatures over 35°C (95°F) will reduce its lifespan. If possible, store the device in an area that is not exposed to temperature extremes.
Water Resistance
Go Direct Platinum-Cell Conductivity is not water resistant and should never be immersed in water.
If water gets into the device, immediately power the unit down (press and hold the power button for more than three seconds). Disconnect the sensor and charging cable, and remove the battery. Allow the device to dry thoroughly before attempting to use the device again. Do not attempt to dry using an external heat source.
How the Sensor Works
Go Direct Platinum-Cell Conductivity measures the ability of a solution to conduct an electric current between two electrodes. In solution, the current flows by ion transport. Therefore, an increasing concentration of ions in the solution will result in higher conductivity values.
Go Direct Platinum-Cell Conductivity is actually measuring conductance, defined as the reciprocal of resistance. When resistance is measured in ohms, conductance is measured using the SI unit, siemens (formerly known as a mho). Aqueous samples are commonly measured in microsiemens, µS.
Even though Go Direct Platinum-Cell Conductivity is measuring conductance, we are often interested in finding conductivity of a solution. Conductivity, C, is found using the following formula:
C = G × kc
where G is the conductance, and kc is the cell constant. The cell constant is determined for a probe using the following formula:
kc = d /A
where d is the distance between the two electrodes, and A is the area of the electrode surface.
For example, the cell in Figure 1 has a cell constant:
kc = d / A = 1.0 cm / 1.0 cm2= 1.0 cm-1
The conductivity value is found by multiplying conductance and the cell constant. Since Go Direct Platinum-Cell Conductivity also has a cell constant of 1.0 cm-1, its conductivity and conductance have the same numerical value. For a solution with a conductance value of 1000 µS, the conductivity, C, would be:
C = G•kc = (1000 µS) × (1.0 cm-1) = 1000 µS/cm
A potential difference is applied to the two probe electrodes in Go Direct Platinum-Cell Conductivity. The resulting current is proportional to the conductivity of the solution. This current is converted into a voltage. Alternating current is supplied to prevent the complete ion migration to the two electrodes. Each cycle of the alternating current, the polarity of the electrodes is reversed, which in turn reverses the direction of ion flow. This very important feature of Go Direct Platinum-Cell Conductivity prevents most electrolysis and polarization from occurring at the electrodes. Thus, the solutions that are being measured for conductivity are not fouled. It also greatly reduces redox products from forming on the platinum-cell electrodes.
Temperature Compensation
Go Direct Platinum-Cell Conductivity has two temperature compensation settings: 0% and 2%. The 2% setting is designed for most aqueous salt solutions.
If you select the 2% setting, the sensor reading is automatically temperature compensated between temperatures of 5 and 35°C. Note that the temperature of a solution is being read by a thermistor that is embedded in the electrode. Readings are automatically referenced to a conductivity value at 25°C; therefore, Go Direct Platinum-Cell Conductivity gives the same conductivity reading in a solution that is at 15°C as it would if the same solution were warmed to 25°C. This means you can calibrate your probe in the lab, and then use these stored calibrations to take readings in colder (or warmer) water in a lake or stream.
If you are testing a non-aqueous solution and want temperature-compensated readings, you have to perform your own temperature standardization curve or research the value. Some values are presented in Table 1. If the 0% temperature compensation setting is selected, the probe is not temperature compensated and you will notice a change in the conductivity reading as temperature changes, even though the actual ion concentration does not change. This setting allows you to investigate conductivity as a function of temperature.
|
Sample |
Conductivity, μS/cm |
% change/°C (at 25°C) |
|
Ultrapure Water |
0.055 |
4.55 |
|
Drinking Water |
50–500 |
2.00 |
|
0.1% NaCl |
1990 |
2.12 |
|
0.03% NaOH |
1780 |
1.72 |
|
20% Acetic Acid |
1600 |
1.56 |
|
5% NaOH |
223,000 |
1.72 |
|
10% HCl |
700,000 |
1.32 |
Troubleshooting
When testing Go Direct Platinum-Cell Conductivity, it is best to measure a standard solution because it is easier to determine if the sensor is reading correctly. If your Go Direct Platinum-Cell Conductivity is reading differently from the standard solution, you may simply need to calibrate the sensor. See the Calibrating the Sensor section for more information. Here are some other tips to ensure best data collection practices:
- Blot the inside and outside of the electrode cell dry to avoid water droplets diluting or contaminating the sample to be tested.
- Be sure the electrode surfaces in the elongated cell are completely submerged in the liquid and that there are no bubbles around the electrode surface.
- Gently swirl the probe, or stir the solution with a stirring bar and stir plate, during data collection.
- Do not completely submerge the sensor. The handle is not waterproof.
- If you are taking readings at temperatures below 15°C or above 30°C, allow more time for the temperature compensation to adjust and provide a stable conductivity reading.
- When you have finished using Go Direct Platinum-Cell Conductivity, simply rinse it off with distilled water and blot it dry using a paper towel or lab wipe. The probe can then be stored dry.
- If the probe cell surface is contaminated, soak it in water with a mild detergent for 15 minutes. Then soak it in a dilute acid solution (0.1 M hydrochloric acid or 0.5 M acetic acid works well) for another 15 minutes. Then rinse it well with distilled water and blot dry. Important: Avoid scratching the inside electrode surfaces of the elongated cell.
- When using the Platinum-Cell Conductivity Probe with other Vernier sensors, some combinations of sensors interfere with each other when placed in the same solution. The degree of interference depends on many factors, including which combination of sensors is being used, which interface is being used, among others.
For additional troubleshooting and FAQs, see www.vernier.com/til/10228
Sampling in Streams and Lakes
It is best to sample away from shore and below the water surface, if possible. In free-flowing streams, there will usually be good mixing of the water, so that samples taken near the current will be quite representative of the stream as a whole. If you are sampling an impounded stream or a lake, there will be very little mixing; therefore, it is important to sample away from shore and at different depths, if possible. Do not drop Go Direct Platinum-Cell Conductivity so that the entire electrode is submerged. The electrode is not constructed to withstand higher pressures, so seepage into electronic components of the electrode will result. Although it is better to take readings at the collection site, readings of total dissolved solids or conductivity should not change significantly if you collect samples and take readings at a later time. However, be sure that samples are capped to prevent evaporation.
If sample bottles are filled brim full, then a gas such as carbon dioxide, which is capable of forming ionic species in solution, is prevented from dissolving in the water sample. Since the probe has built-in temperature compensation, you can do your calibration in the lab. This means that even though you will be sampling in water that has a different temperature than your calibration temperature, the probe will take correct readings at the new sampling temperature.
Sampling in Ocean Water or Tidal Estuaries: Salinity
Salinity is the total of all non-carbonate salts dissolved in water, usually expressed in parts per thousand (1 ppt = 1000 mg/L). Unlike chloride (Cl-) concentration, you can think of salinity as a measure of the total salt concentration, comprised mostly of Na+ and Cl- ions. Even though there are smaller quantities of other ions in seawater (e.g., K+, Mg2+, or SO42-), sodium and chloride ions represent about 91 percent of all seawater ions. Salinity is an important measurement in seawater or in estuaries where freshwater from rivers and streams mixes with salty ocean water. The salinity level in seawater is fairly constant, at about 35 ppt (35,000 mg/L), while brackish estuaries may have salinity levels between 1 and 10 ppt. The salinity range of Go Direct Platinum-Cell Conductivity is 0 to 10 ppt. Seawater has a salinity of 35 ppt, so any seawater samples will need to be diluted before making measurements with this sensor. We recommend that you dilute seawater samples (or other samples that initially give readings above 10 ppt) to 1/4 of their original concentration, then multiply their measured salinity reading by 4 to obtain a final salinity value, in ppt. Brackish water in coastal estuaries is often in the range of 0 to 10 ppt, well within the high range of the probe.
Since there is no stored salinity calibration for Go Direct Platinum-Cell Conductivity, perform a two-point calibration using 5 ppt and 10 ppt salinity standards. Make sure your sensor switch is on the high conductivity setting. You will need to prepare two standard solutions to calibrate for salinity:
- A low standard (5 ppt salinity), add 4.60 g of NaCl to enough distilled water to prepare 1 liter of solution.
- A high standard (10 ppt salinity), add 9.20 g of NaCl to enough distilled water to prepare 1 liter of solution.
Determining the Concentration: Total Dissolved Solids
Because there is a nearly linear relationship between conductivity and concentration of a specific ion or salt, Go Direct Platinum-Cell Conductivity can be used to determine the concentration of an ion. A curve can be obtained if you prepare or purchase standard solutions. Note in this figure the 2:1 ratio between conductivity in µS/cm and TDS concentration in mg/L. Even though total dissolved solids is often defined in terms of this 2:1 ratio, it should be understood that a TDS reading of 500 mg/L can have a different meaning in a sample that is mostly NaCl than in another sample that is composed primarily of hard water ions such as Ca2+ and HCO3-. The relationship between conductivity and sodium chloride concentration is approximately a 2:1 ratio and is very nearly a direct relationship.
Repair Information
If you have watched the related product video(s), followed the troubleshooting steps, and are still having trouble with your Go Direct Platinum-Cell Conductivity, contact Vernier Technical Support at support@vernier.com or call 888-837-6437. Support specialists will work with you to determine if the unit needs to be sent in for repair. At that time, a Return Merchandise Authorization (RMA) number will be issued and instructions will be communicated on how to return the unit for repair.
Accessories/Replacements
| Item | Order Code |
|---|---|
|
CON-LST |
|
|
CON-MST |
|
|
CON-HST |
|
|
CB-USB-MICRO |
|
| Go Direct 300 mAh Replacement Battery |
GDX-BAT-300 |
| USB-C to Micro USB Cable |
CB-USB-C-MICRO |
Warranty
Warranty information for this product can be found on the Support tab at www.vernier.com/gdx-conpt/#support
General warranty information can be found at www.vernier.com/warranty
Disposal
When disposing of this electronic product, do not treat it as household waste. Its disposal is subject to regulations that vary by country and region. This item should be given to an applicable collection point for the recycling of electrical and electronic equipment. By ensuring that this product is disposed of correctly, you help prevent potential negative consequences on human health or on the environment. The recycling of materials will help to conserve natural resources. For more detailed information about recycling this product, contact your local city office or your disposal service.
Battery recycling information is available at www.call2recycle.org
Do not puncture or expose the battery to excessive heat or flame.
 The symbol, shown here, indicates that this product must not be disposed of in a standard waste container.
Contact Support
Fill out our online support form or call us toll-free at 1-888-837-6437.