Go Direct® Voltage Probe User Manual
Order Code: GDX-VOLT
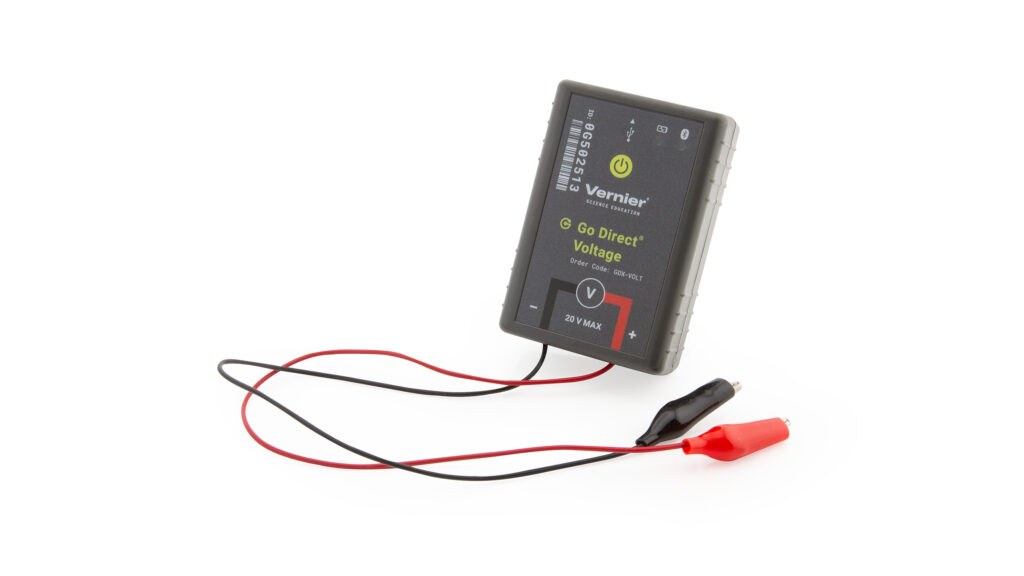
Go Direct Voltage combines a wide input voltage range and high precision, making it an excellent choice for investigations of both AC/DC circuits and electromagnetism. It directly connects via Bluetooth® wireless technology or wired via USB to your platform.
Note: Vernier products are designed for educational use. Our products are not designed nor are they recommended for any industrial, medical, or commercial process such as life support, patient diagnosis, control of a manufacturing process, or industrial testing of any kind.
What's Included
- Go Direct Voltage
- Micro USB Cable
Compatible Software
Choose a platform below to see its compatibility requirements.LabQuest
Interface LabQuest App LabQuest 3 Full support LabQuest 2 Full support 1 LabQuest Incompatible Compatibility Notes
Computers
Software Interface Graphical Analysis Graphical Analysis (Web App) No interface required Full support Full support LabQuest 3 Full support 1 Incompatible LabQuest 2 Full support 1 2 Incompatible Compatibility Notes
Chromebook
Software Interface Graphical Analysis (Web App) No interface required Full support iOS
Software Interface Graphical Analysis Graphical Analysis GW No interface required Full support Full support LabQuest 3 Full support 1 2 Full support 1 2 LabQuest 2 Full support 1 2 3 Full support 1 2 3 Compatibility Notes
Android
Software Interface Graphical Analysis Graphical Analysis GW No interface required Full support Incompatible LabQuest 3 Full support 1 2 Full support 1 LabQuest 2 Full support 1 2 3 Full support 1 3 Compatibility Notes
Python
Software Interface Python No interface required Full support Javascript
Software Interface Javascript No interface required Full support 1 Compatibility Notes
LabVIEW
Software Interface NI LabVIEW No interface required Full support
Quick Start: Vernier Graphical Analysis® and Bluetooth®
- Charge your sensor for at least 2 hours before first use.
- Turn on your sensor. The LED will blink red.
- Launch Graphical Analysis, then click Sensor Data Collection.
- Select your sensor from the list. The sensor ID is located on the sensor label near the bar code. Note: If you don’t see a list of available sensors, click WIRELESS. After selecting your sensor, click Pair.
- This is a multi-channel sensor. Click SENSOR CHANNELS and select the channel(s) you want to use.
- Click DONE. You are now ready to collect data.
Using other Vernier data-collection apps or want to connect via USB?
Visit www.vernier.com/start-go-direct
Note: This sensor also works with LabQuest 2 and LabQuest 3; it does not work with the original LabQuest.
Charging the Sensor
Connect Go Direct Voltage to the included USB Charging Cable and any USB device for two hours.
You can also charge up to eight Go Direct Voltage Probes using our Go Direct Charge Station, sold separately (order code: GDX-CRG). An LED on each Go Direct Voltage indicates charging status.
| Charging |
Orange LED next to the battery icon is solid while the sensor is charging. |
| Fully charged |
Green LED next to the battery icon is solid when the sensor is fully charged. |
Powering the Sensor
| Turning on the sensor |
Press button once. Red LED indicator flashes when unit is on. |
| Putting the sensor in sleep mode |
Press and hold button for more than three seconds to put into sleep mode. Red LED indicator stops flashing when sleeping. |
Connecting the Sensor
See the following link for up-to-date connection information:
www.vernier.com/start/gdx-volt
Connecting via Bluetooth
| Ready to connect | Red LED next to the Bluetooth icon flashes when sensor is awake and ready to connect. |
| Connected | Green LED next to the Bluetooth icon flashes when sensor is connected via Bluetooth. |
Connecting via USB
| Connected and charging | Orange LED next to the battery icon is solid when the sensor is connected to Graphical Analysis via USB and the unit is charging. LED next to Bluetooth icon is off. |
| Connected, fully charged | Green LED next to the battery icon is solid when the sensor is connected to Graphical Analysis via USB and fully charged. LED next to Bluetooth icon is off. |
| Charging via USB, connected via Bluetooth |
Orange LED next to the battery icon is solid when the sensor is charging. Green LED next to the Bluetooth icon flashes. |
Identifying the Sensor
When two or more sensors are connected, the sensors can be identified by tapping or clicking Identify in Sensor Information.
Using the Product
Connect the sensor following the steps in the Getting Started section of this user manual. For best results, connect Go Direct Voltage via Bluetooth to your device. Connecting via Bluetooth isolates Go Direct Voltage from electrical noise that can be transmitted from your device when connected via USB.
Go Direct Voltage is designed to be used like a voltmeter. The leads should be placed across a circuit element.
Go Direct Voltage has two measurement ranges, each its own channel:
- Potential - 20 V
- Potential - 1 V
Potential - 20 V
This channel is the default for Go Direct Voltage and appropriate for most table-top circuit experiments. The differential input range is 20 V. When used by USB, the mean input voltage must be within 11 V of ground.
Potential - 1 V
This extra channel is for appropriate smaller voltage signals, such as the induced EMFs. The differential input range is 2 V.
Over-voltage protection is provided so that slightly higher input voltages will not damage the sensor. You should never use high voltages or household AC with this probe.
Displaying data
Click or tap the view icon and select Meter. The instantaneous sensor readings are all displayed. Click or tap any meter to zero or calibrate that sensor.
Graphing data
Click or tap the view icon and choose the number of graphs you wish to display. For each graph, click or tap on the y‑axis label to select which sensor data you would like displayed on that graph. Change data collection parameters (duration, sampling rate) by clicking or tapping on graph options. When ready to collect data, click or tap collect.
Videos
Calibration
You should not have to perform a new calibration when using Go Direct Voltage in the classroom. We have set the sensor to match our stored calibration before shipping it.
If you choose to calibrate Go Direct Voltage for increased accuracy, use the standard, two-point calibration procedure. Another option to consider instead of calibrating is zeroing the sensor. This is done by shorting out the leads of the sensor, then choosing the Zero option in the data-collection software. This option adjusts the calibration offset but does not adjust the calibration gain.
Specifications
|
Differential input voltage range |
20 V |
|
Accuracy |
≤ ±1.0% FS |
|
Maximum safe voltage on any input |
24 V |
|
Input impedance (to ground) |
10 MΩ |
|
Differential impedance |
>20 MΩ |
|
Linearity |
0.01% |
|
Resolution, 16-bit |
5 mV on Potential - 20 V channel |
|
Maximum sampling rate |
1,000 samples/s |
|
USB specification |
USB 2.0 full speed |
|
Wireless specification |
Bluetooth v4.2 |
|
Maximum wireless range |
30 m (unobstructed) |
|
Battery |
300 mAh Li-Poly Rechargeable |
|
Battery life (single full charge) |
About 24 hours continuous data collection |
|
Battery life (long term) |
About 300 full charge cycles (several years, depending on usage) |
Care and Maintenance
Clean sensor with a soft, damp cloth.
Battery Information
Go Direct Voltage contains a small lithium-ion battery. The system is designed to consume very little power and not put heavy demands on the battery. Although the battery is warranted for one year, the expected battery life should be several years. Replacement batteries are available from Vernier (order code: GDX-BAT-300).
Storage and Maintenance
To store Go Direct Voltage for extended periods of time, put the device in sleep mode by holding the button down for at least three seconds. The red LED will stop flashing to show that the unit is in sleep mode. Over several months, the battery will discharge but will not be damaged. After such storage, charge the device for a few hours, and the unit will be ready to go.
Exposing the battery to temperatures over 35°C (95°F) will reduce its lifespan. If possible, store the device in an area that is not exposed to temperature extremes.
Water Resistance
Go Direct Voltage is not water resistant and should never be immersed in water.
If water gets into the device, immediately power the unit down (press and hold the power button for more than three seconds). Disconnect the sensor and charging cable, and remove the battery. Allow the device to dry thoroughly before attempting to use the device again. Do not attempt to dry using an external heat source.
How the Sensor Works
Go Direct Voltage measures the potential difference between the V+ clip (red) and the V– clip (black). The voltage probes have differential inputs. The voltage measured is with respect to the black clip and not circuit ground. This allows you to measure directly across circuit elements without the constraints of common grounding. The voltage probes can be used to measure negative potentials, as well as positive potentials.
Troubleshooting
If the Differential Voltage Probe is not operating as expected, check the following:
- Are the leads properly and securely connected? The probe is designed to be used like voltmeter leads. It should be placed across a circuit element.
- Is the sensor voltage fluctuating? Try a DC power source, such as a battery. When measuring DC voltages with power supplies, some power supplies do not provide a steady DC signal. If the sensor reading is correct when using a battery, the problem may be the power supply.
For additional troubleshooting and FAQs, see www.vernier.com/til/3902
Repair Information
If you have followed the troubleshooting steps and are still having trouble with your Go Direct Voltage, contact Vernier Technical Support at support@vernier.com or call 888-837-6437. Support specialists will work with you to determine if the unit needs to be sent in for repair. At that time, a Return Merchandise Authorization (RMA) number will be issued and instructions will be communicated on how to return the unit for repair.
Accessories/Replacements
| Item | Order Code |
|---|---|
|
CB-USB-MICRO |
|
|
CB-USB-C-MICRO |
|
|
GDX-BAT-300 |
Warranty
Warranty information for this product can be found on the Support tab at www.vernier.com/gdx-volt/#support
General warranty information can be found at www.vernier.com/warranty
Disposal
When disposing of this electronic product, do not treat it as household waste. Its disposal is subject to regulations that vary by country and region. This item should be given to an applicable collection point for the recycling of electrical and electronic equipment. By ensuring that this product is disposed of correctly, you help prevent potential negative consequences on human health or on the environment. The recycling of materials will help to conserve natural resources. For more detailed information about recycling this product, contact your local city office or your disposal service.
Battery recycling information is available at www.call2recycle.org
Do not puncture or expose the battery to excessive heat or flame.
 The symbol, shown here, indicates that this product must not be disposed of in a standard waste container.
Contact Support
Fill out our online support form or call us toll-free at 1-888-837-6437.