Yes, you can drive the output of the Power Amplifier (
^ Original LabQuest must be running v1.3 or newer.
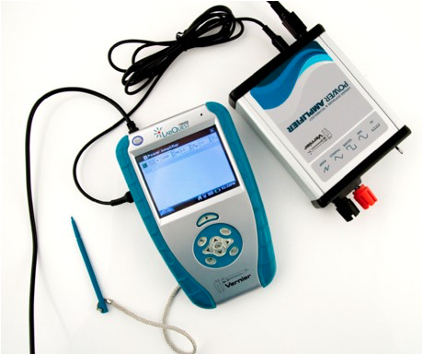
Using a LabQuest device
- Connect the Power Amplifier to the LabQuest audio out port using the audio cable.
- Connect the LabQuest to the computer via USB.
- Launch Logger Pro.
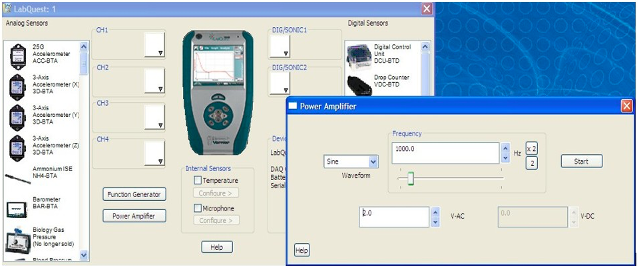
- From the Experiment menu, choose Set Up Sensors > Show All Interfaces. This will display the sensor set up box.
- Click the Power Amplifier button. This will display the Power Amplifier controls.
- Select a waveform, frequency, and amplitude.
- For the sine, square wave, ramp and triangle waveforms, you can set the frequency using the keyboard, the ×2 and ÷2 buttons, or the slider. The VDC control is only used for the DC waveform.
- Close the sensor dialog box. Note: You can adjust Power Amplifier output during data collection by leaving the Power Amplifier window open.
- Set data collection rate and duration as needed.
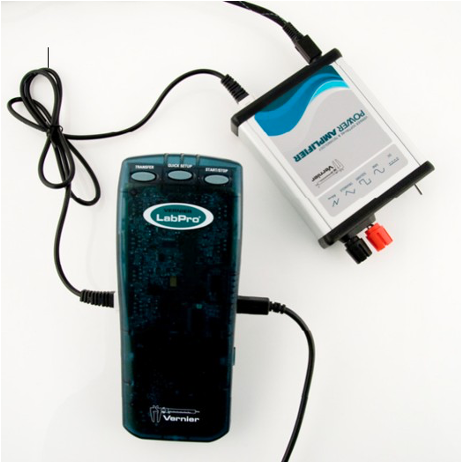
Using a LabPro
LabPro includes an analog-output function for generating low-frequency waveforms and DC offsets. The Power Amplifier can be used to amplify that output so that larger loads can be used. The analog output is available only on CH4 of LabPro.
- Connect the supplied BTA cable between the current sense output on the Power Amplifier and CH4 on LabPro.
- Connect any other sensors, such as voltage probes, to other inputs.
- Launch Logger Pro. Logger Pro will detect the current sensor of the Power Amplifier.
- Enable analog out by choosing Set Up Sensors ▶ LabPro from the Experiment menu.
- Click the CH4 menu in the resulting sensors dialog, and select Analog Out.
- From the Analog Out dialog box*, select a waveform, then set the frequency and amplitude. Note: A gain of a factor of two is applied to the LabPro input, so that a LabPro output of 1 V results in a Power Amplifier output of 2 V.
- Close the dialog boxes.
- Set data collection rate and duration as needed.
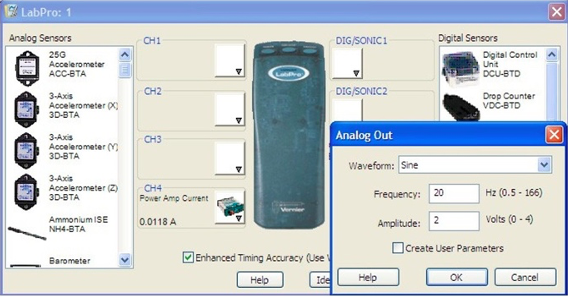
* If you enable user parameters in the Analog Out dialog box, the frequency and amplitude will be controllable by Parameter Controls. Choose Parameter Controls from the Insert menu to add these to your Logger Pro session. These controls will let you modify the frequency and amplitude during data collection, without having to reopen the Analog Out dialog box.