Qubit GSR Sensor User Manual
Order Code: Q-S222
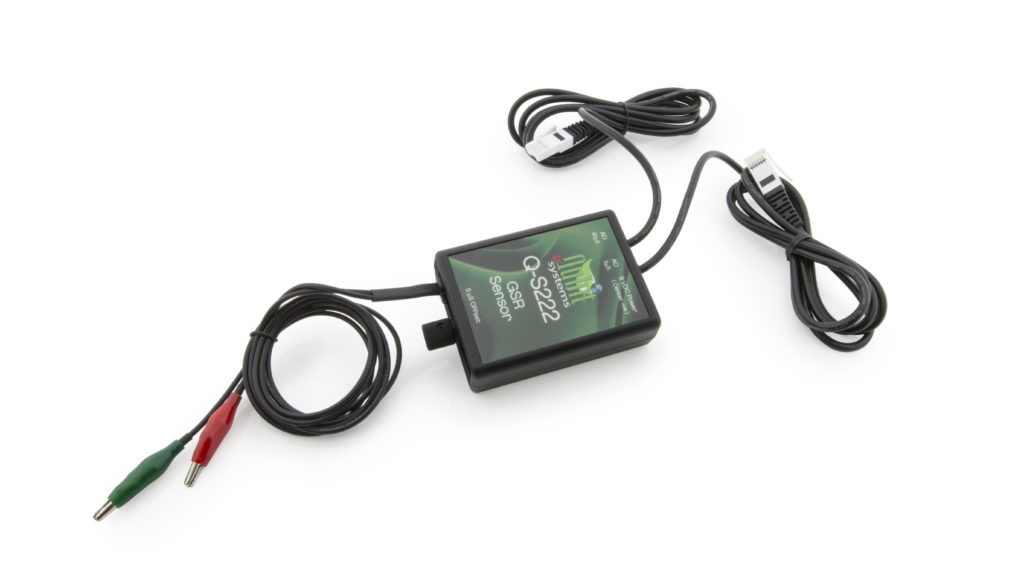
The Q-S222 Qubit GSR (Galvanic Skin Response) Sensor measures the psycho-galvanic reflex. This reflex generates a change in skin conductivity during periods of stress, excitement, or shock.
Note: This product is designed for educational use and research in an academic setting only. This product is not designed nor recommended for medical use in a clinical setting. It should not be used for clinical monitoring, life support, patient diagnosis, or clinical testing of any kind.
What's Included
- Qubit GSR Sensor
- Power supply
- One package of 100 disposable electrodes
Note: The full user manual can be found on the included thumb drive and at www.vernier.com/files/manuals/q-s222.qubit-manual.pdf
Compatible Software and Interfaces
Choose a platform below to see its compatibility requirements.LabQuest
Interface LabQuest App LabQuest 3 Full support 1 LabQuest 2 Full support 1 LabQuest Incompatible Compatibility Notes
Computers
Software Interface Logger Pro (discontinued) LabQuest Mini Full support 1 LabQuest 3 Full support 1 LabQuest 2 Full support 1 LabQuest Stream Partial support 1 2 LabQuest Full support 1 LabPro Full support 1 Compatibility Notes
Arduino
Software Interface Arduino Vernier Arduino® Interface Shield Full support 1 2 Compatibility Notes
LabVIEW
Software Interface NI LabVIEW SensorDAQ Full support 1 Vernier myDAQ Adapter Full support 1 2 LabQuest Mini Full support 1 3 Compatibility Notes
Using the Product
Note: This sensor will not be automatically identified by Logger Pro or LabQuest App. Use the following instructions for best results.
Electrode Placement
- Make sure the subject's hands are clean and dry. If necessary, have them wash their hands with soap and water. Do not use alcohol wipes or alcohol-based cleansers, as this will dry the skin and alter skin conductance.
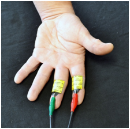
- Press the electrode tabs on the index and middle fingers as shown in Figure 1.
- Connect the sensor clips to the electrode tabs as shown in Figure 1. The color of the leads is not important. Have the subject sit in a relaxed position in a chair with their forearms resting on their legs or on the arms of the chair.
Collecting Data with a Computer
- Connect the power supply to the sensor.
- Connect the sensor to the Vernier data-collection interface.
- Connect the 40 µS cable to CH 1 of the interface.
- Connect the 5 µS cable to CH 2.
- Set up the data-collection program.
- Connect the interface to the computer and start Logger Pro.
- Open the file, "Q-S222 GSR Setup" from the Qubit folder within the Probes & Sensors folder. Note: If you cannot locate this file in Logger Pro, it can be downloaded at www.vernier.com/q-s222
- Place the electrodes on the subject and attach the sensor leads as described above.
- Turn the dial on the front of the sensor clockwise until it stops.
- Have the subject sit and relax for 1–3 minutes.
- Adjust the dial on the front of the sensor until the reading on GSR(5) meter is between 2–3 µS.
You are now ready to begin data collection.
Collecting Data with LabQuest App
Note: This sensor works with LabQuest 2 and LabQuest 3; it does not work with the original LabQuest.
- Connect the power supply to the sensor.
- Connect the sensor to LabQuest 2 or newer.
- Connect the 40 µS cable to CH 1.
- Connect the 5 µS cable to CH 2.
- Choose New from the File menu.
- Place the electrodes on the subject and attach the sensor leads as described above.
- Set up LabQuest for data collection.
- On the Meter screen, tap Sensors and then select Sensor Setup.
- Tap CH 1, scroll down the list of sensors, and tap Qubit.
- Select q-S222 GSR (40µS) and tap OK.
- Repeat Steps a–b for CH 2.
- Select q-S222 GSR (5µS) and tap OK.
- Tap OK again to return to the Meter screen.
- Turn the dial on the front of the sensor clockwise until it stops.
- Have the subject sit and relax for 1–3 minutes.
- Adjust the dial on the front of the sensor until the reading on CH 2 is between 2–3 µS.
You are now ready to begin data collection.
Repair Information
If you are having trouble with your Qubit GSR Sensor, contact Vernier Technical Support at support@vernier.com or call 888-837-6437. Support specialists will work with you to determine if the unit needs to be sent in for repair. At that time, a Return Merchandise Authorization (RMA) number will be issued and instructions will be communicated on how to return the unit for repair.
Accessories/Replacements
| Item | Order Code |
|---|---|
|
ELEC |
Warranty
Warranty information for this product can be found on the Support tab at www.vernier.com/q-s222/#support
General warranty information can be found at www.vernier.com/warranty
Contact Support
Fill out our online support form or call us toll-free at 1-888-837-6437.