Calcium Ion-Selective Electrode User Manual
Order Code: CA-BTA
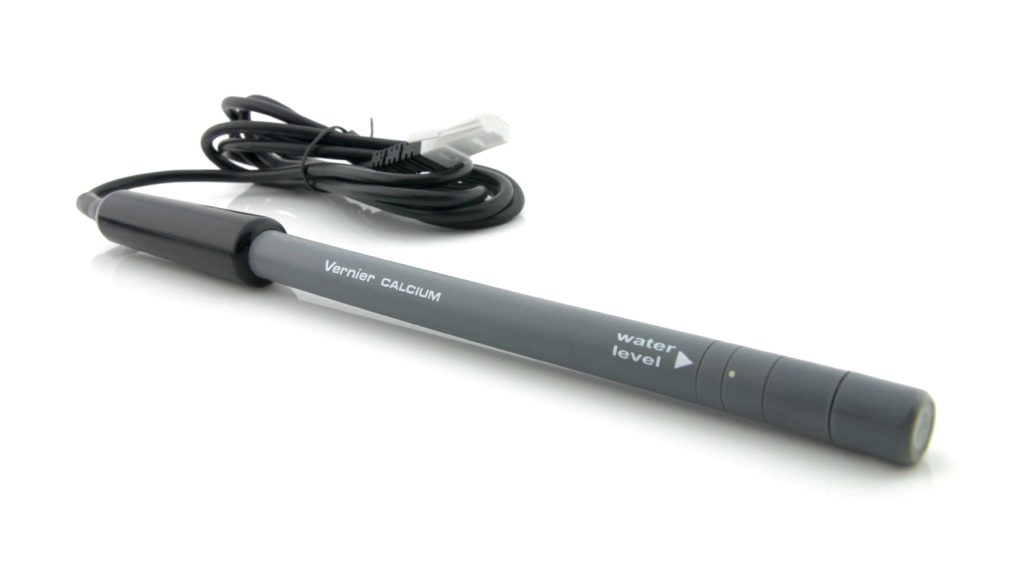
The Vernier Calcium Ion-Selective Electrode is used to measure the concentration of calcium (Ca2+) ions in aqueous samples.
Note: Vernier products are designed for educational use. Our products are not designed nor are they recommended for any industrial, medical, or commercial process such as life support, patient diagnosis, control of a manufacturing process, or industrial testing of any kind.
What's Included
- Calcium Ion-Selective Electrode, packed in a storage bottle
- 30 mL bottle of High Standard solution with SDS (1000 mg/L Ca2+ or 1000 ppm Ca2+)
- 30 mL bottle of Low Standard solution with SDS (10 mg/L Ca2+ or 10 ppm Ca2+)
- Short-Term ISE Soaking Bottle
Compatible Software and Interfaces
Choose a platform below to see its compatibility requirements.LabQuest
Interface LabQuest App LabQuest 3 Full support LabQuest 2 Full support LabQuest Full support Computers
Software Interface Graphical Analysis Graphical Analysis (Web App) Logger Pro (discontinued) Logger Lite (discontinued) LabQuest Mini Full support Full support Full support Full support LabQuest 3 Full support Full support Full support Incompatible LabQuest 2 Full support Full support Full support Full support LabQuest Stream Full support 1 Full support 1 Partial support 2 Full support 1 Go! Link Full support Full support Full support Full support LabQuest Full support Full support Full support Full support LabPro Incompatible Incompatible Full support Full support Compatibility Notes
Chromebook
Software Interface Graphical Analysis (Web App) LabQuest Mini Full support LabQuest 3 Full support LabQuest 2 Full support LabQuest Stream Full support 1 Go! Link Full support LabQuest Full support Compatibility Notes
iOS
Software Interface Graphical Analysis Graphical Analysis GW LabQuest Stream Full support Full support LabQuest 3 Full support 1 Full support 1 LabQuest 2 Full support 1 Full support 1 Compatibility Notes
Android
Software Interface Graphical Analysis Graphical Analysis GW LabQuest Stream Full support Incompatible LabQuest 3 Full support 1 Full support 1 LabQuest 2 Full support 1 Full support 1 Compatibility Notes
Arduino
Software Interface Arduino Vernier Arduino® Interface Shield Full support 1 Compatibility Notes
LabVIEW
Software Interface NI LabVIEW SensorDAQ Full support 1 Vernier myDAQ Adapter Full support 1 2 Go! Link Full support 1 LabQuest Mini Full support LabQuest Stream Full support LabQuest 3 Full support LabQuest 2 Full support LabQuest Full support Compatibility Notes
Texas Instruments
Software Interface EasyData DataMate TI-84 SmartView DataQuest TI-Nspire Software EasyLink Full support 1 Incompatible Full support 2 Full support Full support 2 CBL 2 Full support 3 Full support 3 4 Incompatible Incompatible Incompatible LabPro Full support 3 Full support 3 4 Incompatible Incompatible Incompatible TI-Nspire Lab Cradle Incompatible Incompatible Incompatible Full support Full support Compatibility Notes
Quick Start
- Prepare the electrode by soaking it in the High Standard solution for 30 minutes. Refer to the next section for more information.
- Plug the sensor into the interface (LabQuest 3, LabQuest Mini, etc.).
- Connect the interface to your device.
- If using USB, connect to the USB port on your computer.
- If using Bluetooth® wireless technology, click your interface type and then select your device.
- Prepare for data collection:
- Vernier Graphical Analysis®: Launch the app, if necessary, and click Sensor Data Collection.
- LabQuest® App: Choose New from the File menu.
- The software will identify the sensor and load a default data-collection setup. You are now ready to collect data.
- Perform a two-point calibration using the High and Low Standard solutions. Refer to the next section for more information.
Need Additional Information?
Visit the following link:
Preparing the Calcium ISE for Use
Note: Follow this two-part process before taking measurements with your ISE.
Part I: Soak the Electrode
Soak the electrode in the High Standard solution (included with the ISE) for approximately 30 minutes. The ISE should not rest on the bottom of the container, and the small white reference contacts near the tip of the electrode should be immersed. Make sure no air bubbles are trapped below the ISE. Important: Do not leave the ISE soaking for more than 24 hours. Important: If you plan to use the electrode outside the range of the standards provided, you will need to prepare your own standards and use those for soaking.
Note: If the ISE needs to be transported to the field during the soaking process, use the Short-Term ISE Soaking Bottle. Remove the cap from the bottle and fill it 3/4 full with High Standard. Slide the bottle’s cap onto the ISE, insert it into the bottle, and tighten.
For long-term storage, greater than 24 hours, make sure the sensor is stored in its storage bottle with the sponge slightly damp.
Part II: Calibrate the ISE
Calibrating the Calcium ISE in Graphical Analysis
- Connect the sensor according to the Quick Start section.
- Click or tap the live readouts meter and choose Calibrate.
- High Standard Calibration Point: The Calcium ISE should still be soaking in the High Standard. The ISE should not rest on the bottom of the container, and the 2 small white reference contacts near the tip of the electrode should be immersed. Make sure no air bubbles are trapped below the ISE.
- Enter the concentration value of the High Standard (e.g., 1000 for 1000 mg/L) in the edit box and click or tap Keep.
- Low Standard Calibration Point: Remove the ISE from the High Standard, rinse well with distilled water, and gently blot the ISE dry with a paper towel. Place the ISE into the Low Standard. Make sure the ISE is not resting on the bottom of the container, the white reference contacts near the tip of the electrode are immersed, and no air bubbles are trapped below the ISE.
- Enter the concentration value for the Low Standard (e.g., 10 for 10 mg/L) and click or tap Keep .
- Click or tap Apply to complete the calibration process.
Calibrating the Calcium ISE with LabQuest App
- Connect the Calcium ISE to LabQuest. Choose Calibrate from the Sensors menu and select Calibrate Now.
- High Standard Calibration Point: The Calcium ISE should still be soaking in the High Standard. The ISE should not rest on the bottom of the container, and the small white reference contacts near the tip of the electrode should be immersed. Make sure no air bubbles are trapped below the ISE.
- Enter the concentration of the High Standard (e.g., 1000 for 1000 mg/L) for Reading 1.
- After the voltage reading stabilizes (~2 minutes), tap Keep.
- Low Standard Calibration Point: Remove the ISE from the High Standard, rinse well with distilled water, and gently blot the ISE dry with a paper towel. Place the ISE into the Low Standard. Make sure the ISE is not resting on the bottom of the container, the white reference contacts near the tip of the electrode are immersed, and no air bubbles are trapped below the ISE.
- Enter the concentration of the Low Standard (e.g., 10 for 10 mg/L) for Reading 2.
- After the voltage reading stabilizes, tap Keep.
- To save the calibration to the sensor, follow the steps below:
- Tap Storage.
- Tap Save Calibration to Sensor. Tap OK.
- Tap OK to complete the process.
Using the Product
Your Calcium Ion-Selective Electrode (ISE) can be used to determine the concentration of aqueous Ca2+ ions, in the range of 1.0 to 40,000 mg/L. It can be especially useful in determining “hardness of water.” Calcium ions are often found in freshwater samples as a result of water flowing over soil and mineral deposits containing limestone, chalk, magnetite, or dolomite. In one common reaction, limestone is dissolved according to the reaction
CaCO3(s) + H+(aq) ↔ Ca2+(aq) + HCO3–(aq)
This reaction and others similar to it produce water with a relatively high concentration of Ca2+ ions, and lesser concentrations of Mg2+ and Fe3+ ions—known as hard water.
Many methods of determining water hardness use “total hardness,” or the sum of hardness due to Mg2+ and Ca2+. Since the Ca2+ concentration of freshwater usually exceeds that of Mg2+, determining the Ca2+ concentration alone is a good indicator of water hardness—we will refer to this measurement as “calcium hardness.” For best results, calibrate the Calcium ISE using the 10 mg/L and 1000 mg/L standards.
It is important to remember that total hardness, taking into account both the Ca and Mg levels, will be about 1.5 times higher than your calcium hardness value. Water hardness varies considerably in different parts of the United States, from levels of less than 60 mg/L (total hardness as CaCO3) in Washington, Oregon, Louisiana, Mississippi, Tennessee, and New England, to levels exceeding 250 mg/L in Midwestern states (Ohio, Indiana, Illinois, Iowa, Nebraska, South Dakota, and Oklahoma). Water with a hardness as CaCO3 level greater than 120 mg/L is considered to be “hard,” while levels exceeding 180 mg/L are referred to as “very hard.” Total water hardness, the sum of calcium and magnesium hardness in mg/L CaCO3, can be determined by titration with EDTA. A protocol can be found in our lab book Water Quality with Vernier. A plot of ln [Ca2+] (natural log of calcium ion concentration) vs. volume is used to determine the equivalence point. The second derivative can be used to calculate the point of maximum inflection at the equivalence point of the titration.
Expressing Calcium Concentration
Using the standard solutions described here, your results will be in units of mg/L of Ca2+. Units of calcium hardness are usually expressed as “calcium hardness as CaCO3”. To convert from units of mg/L of Ca2+ (150 mg/L is used in this example) to units of calcium hardness as CaCO3, in mg/L, you would use this expression:

How Can I Have My ISE Read mV Output Instead of mg/L?
The mV output of the electrode can be calculated using the following equation:
-11.96*(-14.942 – ln(“Calcium (mg/L)”)) – 168.23 = Calcium (mV)
This equation provides the mV output of the electrode, before amplification. If you want post-amplification Volts, the equation is
V = 0.00727*mV + 1.223
Collecting Data
- Make sure the sensor is properly calibrated. If the meter has a reading of 1.0 mg/L and the sensor is not in a 1.0 mg/L solution, you need to calibrate. After calibration, rinse off the tip of the ISE and blot it dry with a paper towel.
- Insert the tip of the ISE into the aqueous sample to be tested. Important: Make sure the ISE is not resting on the bottom of the container, the white reference contacts near the tip of the electrode are immersed, and no air bubbles are trapped below the ISE. Note: Do not completely submerge the sensor. The handle is not waterproof.
- Hold the ISE still until the reading stabilizes and record the displayed reading. Note: With some aqueous samples, especially those at high concentrations, it could take several minutes for the reading of the Calcium ISE to stabilize. If you know the approximate concentrations of your samples, it is best to analyze them from lowest concentration to highest.
Using the Calcium ISE with Other Vernier Sensors
Some combinations of sensors interfere with each other when placed in the same solution. The degree of interference depends on many factors. For more information, see www.vernier.com/til/638
Using Ionic Strength Adjuster Solutions to Improve Accuracy
For optimal results at low concentrations of calcium ions, a standard method for taking measurements with the Calcium Ion-Selective Electrode (ISE) is to add ionic strength adjuster (ISA) solution to each of your standard solutions and samples.
Adding an ISA ensures that the total ion activity in each solution being measured is nearly equal, regardless of the specific ion concentration. This is especially important when measuring very low concentrations of calcium ions. The ISA contains no ions common to the Calcium ISE itself. Note: The additions of ISA to samples or standards described below do not need to have a high level of accuracy—combining the ISA solution and sample solution counting drops using a disposable Beral pipet works fine.
Add the 1.0 M KCl ISA solution (7.46 g KCl / 100 mL solution) to the Ca2+ standard or to the solution being measured, in a ratio of 1 part of ISA (by volume) to 50 parts of total solution (e.g., 1 mL of ISA to 50 mL of total solution, or 2 drops of ISA to 5 mL of total solution).
Videos
Specifications
|
Range (concentration) |
1 to 40,000 mg/L (or ppm) |
|
Reproducibility (precision) |
±10% of full scale (calibrated 10 to 1000 mg/L) |
|
Interfering ions |
Pb2+, Hg2+, Si2+, Fe2+, Cu2+, Ni2+, NH3, Na+, Li+, Tris+, K+, Ba2+, Zn2+, Mg2+ |
|
pH range |
2–8 (no pH compensation) |
|
Temperature range |
0–40°C (no temperature compensation) |
|
Electrode slope |
+26 ±2 mV/decade at 25°C |
|
Electrode resistance |
100 MΩ |
|
Minimum sample size |
Must be submerged 2.8 cm (1.1 in) |
|
Calibration voltages, typical |
1.9 V (1000 mg/L), 1.5 V (10 mg/L) |
|
Electrode length |
155 mm |
|
Body diameter |
12 mm |
|
Cap diameter |
16 mm |
|
Cable length |
100 cm |
Care and Maintenance
Storing the Ion-Selective Electrode
Proper care and storage are important for optimal longevity of your Calcium ISE.
- Long-term storage of the ISE (longer than 24 hours): Moisten the sponge in the bottom of the long-term storage bottle with distilled water. When you finish using the ISE, rinse it off with distilled water and blot it dry with a paper towel. Loosen the lid of the long-term storage bottle and insert the ISE. Note: The tip of the ISE should NOT touch the sponge. Also, make sure the white reference mark is inside the bottle. Tighten the lid. This will keep the electrode in a humid environment, which prevents the reference junctions from completely drying out.
- Short-term wet storage (less than 24 hours): Fill the Short-Term ISE Soaking bottle 3/4 full with High Standard. Loosen the cap, insert the electrode into the bottle, and tighten it.
Maintaining and Replacing the ISE Standard Calibration Solutions
Having accurate standard solutions is essential for performing good calibrations. The two standard solutions that were included with your ISE can last a long time if you take care not to contaminate them. At some point, you will need to replenish your supply of standard solutions. Vernier sells replacement standards in 500 mL volumes. Order codes are
- CA-LST: Calcium Low Standard, 10 mg/L
- CA-HST: Calcium High Standard, 1000 mg/L
To prepare your own standard solutions, use the information in the following table. Note: Use glassware designed for accurate volume measurements, such as volumetric flasks or graduated cylinders. All glassware must be very clean.
| Standard Solution | Concentration (mg/L or ppm) | Preparation Method using High-Quality Distilled Water |
|
Calcium (Ca2+) ISE High Standard |
1000 mg/L Ca |
2.771 g CaCl2 / 1 L solution or 3.669 g CaCl2•2H2O / 1 L solution |
|
Calcium (Ca2+) ISE Low Standard |
10 mg/L as Ca |
Dilute the High Standard by a factor of 100 (from 1000 mg/L to 10 mg/L).* |
*Perform two serial dilutions as described below.
- Combine 100 mL of the High Standard with 900 mL of distilled water. Mix well.
- Combine 100 mL of the solution made in the previous step with 900 mL of distilled water. Mix well.
Do not wrap the cable tightly around the sensor for storage. Repeatedly doing so can irreparably damage the wires and is not covered under warranty.
How the Sensor Works
The Vernier Calcium Ion-Selective Electrode (ISE) is a membrane-based electrode that measures a specific ion (Ca2+) in an aqueous solution. When the membrane of the electrode is in contact with a solution containing the specific ion, a voltage, dependent on the level of that ion in solution, develops at the membrane. The ISE is a combination style electrode. The voltage develops in relation to an internal Ag/AgCl reference electrode. The ISE measures for the specific ion concentration directly. Samples need to be aqueous to avoid contaminating or dissolving the membrane. The Vernier Calcium Ion-Selective Electrode has a solid polymer membrane. The membrane is a porous plastic disk, permeable to the ion exchanger, but impermeable to water. It allows the sensing cell to contact the sample solution and separates the internal filling solution from the sample.
The voltage developed between the sensing and reference electrodes is a measure of the concentration of the reactive ion being measured. As the concentration of the ion reacting at the sensing electrode varies, so does the voltage measured between the two electrodes.
As described in the Nernst Equation, ISE response is a linear equation:
E = Eo + m(ln a)
where E is the measured voltage, Eo is the standard potential for the combination of the two half cells, m is the slope, ln is the natural logarithm, and a is the activity of the measured ion species.
Assuming the ionic strength is fairly constant, the Nernst equation may be rewritten to describe the electrode response to the concentration, C, of the measured ion species:
E = Eo + m(ln C)
Troubleshooting
For troubleshooting and FAQs, see www.vernier.com/til/1434
Repair Information
If you have watched the related product video(s), followed the troubleshooting steps, and are still having trouble with your Calcium Ion-Selective Electrode, contact Vernier Technical Support at support@vernier.com or call
888-837-6437. Support specialists will work with you to determine if the unit needs to be sent in for repair. At that time, a Return Merchandise Authorization (RMA) number will be issued and instructions will be communicated on how to return the unit for repair.
Accessories/Replacements
Calcium ISE Replacement Membrane Modules
The Calcium ISE has a PVC membrane with a limited life expectancy. It is warranted to be free from defects for a period of twelve (12) months from the date of purchase; it is possible, however, that you may get somewhat longer use than the warranty period. If you start to notice a reduced response (e.g., distinctly different voltages or voltage ranges during calibration), it is probably time to replace the membrane module. Important: Do not order membrane modules far in advance of the time you will be using them; the process of degradation takes place even when they are stored on the shelf.
Additional Vernier Ion-Selective Electrodes
Vernier sells Ion-Selective Electrodes that measure the concentration of ammonium (NH4+), , chloride (Cl–), nitrate (NO3-), and potassium (K+) ions in aqueous solutions:
| Item | Order Code |
|---|---|
|
NH4-BTA |
|
| Chloride Ion-Selective Electrode |
CL-BTA |
|
NO3-BTA |
|
| Potassium Ion-Selective Electrode |
K-BTA |
| Electrode Storage Bottles, pkg of 5 |
BTL-ES |
| Standard High Calcium ISE Solution |
CA-HST |
| Standard Low Calcium ISE Solution |
CA-LST |
| Calcium Replacement Module |
CA-MOD |
Warranty
Warranty information for this product can be found on the Support tab at www.vernier.com/ca-bta/#support
General warranty information can be found at www.vernier.com/warranty
Disposal
When disposing of this electronic product, do not treat it as household waste. Its disposal is subject to regulations that vary by country and region. This item should be given to an applicable collection point for the recycling of electrical and electronic equipment. By ensuring that this product is disposed of correctly, you help prevent potential negative consequences on human health or on the environment. The recycling of materials will help to conserve natural resources. For more detailed information about recycling this product, contact your local city office or your disposal service.
Battery recycling information is available at www.call2recycle.org
 The symbol, shown here, indicates that this product must not be disposed of in a standard waste container.
Contact Support
Fill out our online support form or call us toll-free at 1-888-837-6437.