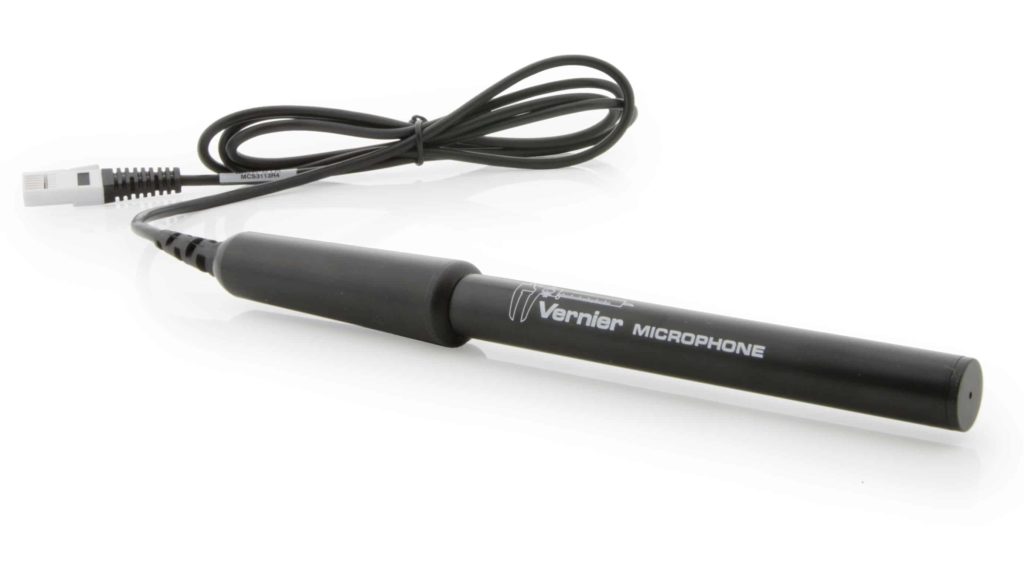
Microphone User Manual
Order Code: MCA-BTA
The Vernier Microphone can be used for a variety of activities with sound waves.
- Demonstrate how the wave pattern changes when frequency and amplitude are changed.
- Compare the waveforms from various musical instruments.
- Have students capture the waveform of the sound of a tuning fork and model the sine wave using a function.
- Measure the speed of sound by using reflected sound waves in a tube.
- Demonstrate beat patterns.
- Determine the period and then the frequency of a sound by measuring the time between peaks on the waveform.
- Display the fast Fourier transform (FFT) of a sound.
Note: Vernier products are designed for educational use. Our products are not designed nor are they recommended for any industrial, medical, or commercial process such as life support, patient diagnosis, control of a manufacturing process, or industrial testing of any kind.
Compatible Software and Interfaces
Choose a platform below to see its compatibility requirements.LabQuest
Interface LabQuest App LabQuest 3 Full support LabQuest 2 Full support LabQuest Full support Computers
Software Interface Graphical Analysis Graphical Analysis (Web App) Logger Pro (discontinued) Logger Lite (discontinued) LabQuest Mini Full support Full support Full support Full support LabQuest 3 Full support Full support Full support Incompatible LabQuest 2 Full support Full support Full support Full support LabQuest Stream Full support 1 Full support 1 Partial support 2 Full support 1 LabQuest Full support Full support Full support Full support LabPro Incompatible Incompatible Full support Full support Compatibility Notes
Chromebook
Software Interface Graphical Analysis (Web App) LabQuest Mini Full support LabQuest 3 Full support LabQuest 2 Full support LabQuest Stream Full support 1 LabQuest Full support Compatibility Notes
iOS
Software Interface Graphical Analysis Graphical Analysis GW LabQuest Stream Full support Full support LabQuest 3 Full support 1 Full support 1 LabQuest 2 Full support 1 Full support 1 Compatibility Notes
Android
Software Interface Graphical Analysis Graphical Analysis GW LabQuest Stream Full support Full support LabQuest 3 Full support 1 Full support 1 LabQuest 2 Full support 1 Full support 1 Compatibility Notes
Arduino
Software Interface Arduino Vernier Arduino® Interface Shield Full support LabVIEW
Software Interface NI LabVIEW SensorDAQ Full support Vernier myDAQ Adapter Full support 1 LabQuest Mini Full support LabQuest Stream Full support LabQuest 3 Full support LabQuest 2 Full support LabQuest Full support Compatibility Notes
Texas Instruments
Software Interface EasyData DataMate DataQuest TI-Nspire Software CBL 2 Full support 1 Full support 1 2 Incompatible Incompatible LabPro Full support 1 Full support 1 2 Incompatible Incompatible TI-Nspire Lab Cradle Incompatible Incompatible Full support Full support Compatibility Notes
Quick Start
- Plug the sensor into the interface (LabQuest 3, LabQuest Mini, etc.).
- Connect the interface to your device.
- If using USB, connect to the USB port on your computer.
- If using Bluetooth® wireless technology, click your interface type and then select your device.
- Prepare for data collection:
- Vernier Graphical Analysis®: Launch the app, if necessary, and click Sensor Data Collection.
- LabQuest® App: Choose New from the File menu.
The software will identify the sensor and load a default data-collection setup. You are now ready to collect data.
Need Additional Information?
Visit the following link:
Using the Product
Connect the sensor following the steps in the Quick Start section of this user manual.
Some guidelines for collecting good waveforms:
- By default, the microphone data‑collection parameters are set such that it will sample very quickly for a very brief time, effectively taking a “snapshot” of the sound waves present when data collection is started. With this in mind, start the sound source you wish to investigate before starting data collection.
- Make sure the sound level is in the correct range to produce good wave patterns. If the sound is too loud, the wave pattern will be clipped off at the top or bottom. Move the microphone farther from the sound source or turn down the volume of the sound.
Calibration
The microphone is uncalibrated, which means that the vertical axis has arbitrary units on waveform graphs. The voltage from the microphone output is what is graphed. For more information, see www.vernier.com/til/656
Specifications
|
Frequency range |
Approximately 100 Hz to 15 kHz |
|
Power |
1.45 mA @ 5 VDC |
|
Default calibration values |
|
How the Sensor Works
The microphone uses an electret microphone that has a frequency response covering essentially the range of the human ear. An op-amp circuit then amplifies the signal and outputs it to the British Telecom (BTA) connector. The output signal is available on two pins in the BTA connector; for additional details see www.vernier.com/til/3639
Troubleshooting
The best source of clean, sine-like waveforms is an inexpensive keyboard set to the flute sound without vibrato.
For further troubleshooting tips, see www.vernier.com/til/1436
Repair Information
If you have followed the troubleshooting steps and are still having trouble with your Vernier Microphone, contact Vernier Technical Support at support@vernier.com or call 888-837-6437. Support specialists will work with you to determine if the unit needs to be sent in for repair. At that time, a Return Merchandise Authorization (RMA) number will be issued and instructions will be communicated on how to return the unit for repair.
Warranty
Warranty information for this product can be found on the Support tab at www.vernier.com/mca-bta/#support
General warranty information can be found at www.vernier.com/warranty
Contact Support
Fill out our online support form or call us toll-free at 1-888-837-6437.

