Rotary Motion Sensor User Manual
Order Code: RMV-BTD
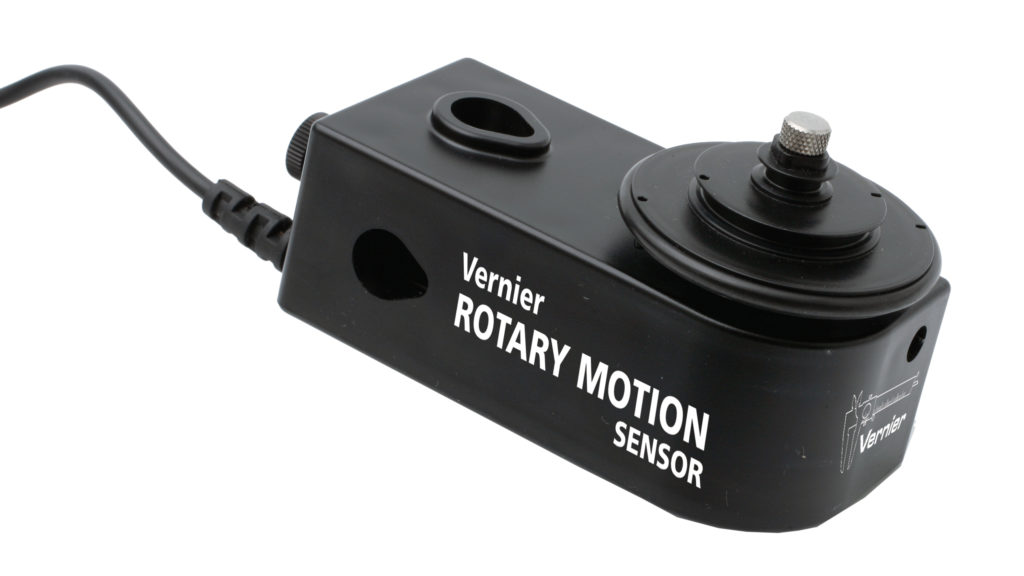
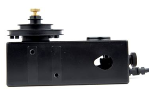
The Vernier Rotary Motion Sensor is a bidirectional angle sensor designed to measure rotational or linear position, velocity and acceleration. It is used for a variety of investigations, including measurement of rotational inertia and verification of the conservation of angular momentum.
Additional experiments and innovative uses can be found at www.vernier.com/rmv-btd
Note: Vernier products are designed for educational use. Our products are not designed nor are they recommended for any industrial, medical, or commercial process such as life support, patient diagnosis, control of a manufacturing process, or industrial testing of any kind.
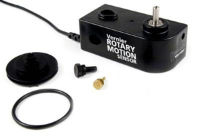
What's Included
- Rotary Motion Sensor
- Thumb screw
- 3-step pulley and mounting screw
- O-ring
Compatible Software
Choose a platform below to see its compatibility requirements.LabQuest
Interface LabQuest App LabQuest 3 Full support LabQuest 2 Full support LabQuest Full support Computers
Software Interface Graphical Analysis Graphical Analysis (Web App) Logger Pro (discontinued) LabQuest Mini Full support Full support Full support LabQuest 3 Full support Full support Full support LabQuest 2 Full support Full support Full support LabQuest Stream Full support 1 Full support 1 Partial support 2 LabQuest Full support Full support Full support LabPro Incompatible Incompatible Full support Compatibility Notes
Chromebook
Software Interface Graphical Analysis (Web App) LabQuest Mini Full support LabQuest 3 Full support LabQuest 2 Full support LabQuest Stream Full support 1 LabQuest Full support Compatibility Notes
iOS
Software Interface Graphical Analysis Graphical Analysis GW LabQuest Stream Full support Incompatible LabQuest 3 Full support 1 Full support 1 LabQuest 2 Full support 1 Full support 1 Compatibility Notes
Android
Software Interface Graphical Analysis Graphical Analysis GW LabQuest Stream Full support Incompatible LabQuest 3 Full support 1 Full support 1 LabQuest 2 Full support 1 Full support 1 Compatibility Notes
Arduino
Software Interface Arduino Vernier Arduino® Interface Shield Full support LabVIEW
Software Interface NI LabVIEW SensorDAQ Full support Vernier myDAQ Adapter Full support Texas Instruments
Software Interface EasyData DataMate DataQuest TI-Nspire Software CBL 2 Full support 1 2 Full support 1 2 3 Incompatible Incompatible LabPro Full support 1 2 Full support 1 2 3 Incompatible Incompatible TI-Nspire Lab Cradle Incompatible Incompatible Full support Full support Compatibility Notes
Getting Started
- Connect the sensor to the interface (LabQuest Mini, LabQuest 3, etc.).
- Start the appropriate data-collection software (Vernier Graphical Analysis®, LabQuest® App, or Logger Pro™) if not already running, and choose New from File menu. The software will identify the sensor and load a default data‑collection setup. You are now ready to collect data.
If you are collecting data using a Chromebook™, mobile device such as iPad® or Android™ tablet, or a Vernier wireless interface, please see the following link for up-to-date connection information:
Using the Product
Example Experiments
The following examples show various ways to use the Rotary Motion Sensor. Some of these examples use accessory products described below.
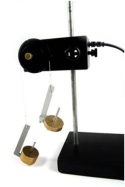
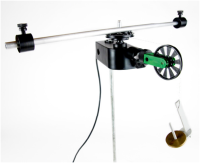
Atwood’s Machine
Attach the 3-step pulley to the rotating shaft. Use the thumb screw to attach the Rotary Motion Sensor to a ring stand. Attach each end of the string to a mass and run the string over the pulley. Use the Rotary Motion Sensor to determine the acceleration of the system.
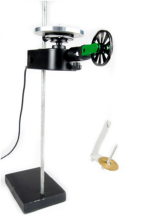
Moment of Inertia of a Disk
(requires Rotational Motion Accessory Kit, see Accessories section)
Attach an Ultra Pulley to the Rotary Motion Sensor. Attach the 3-step pulley to the rotating shaft. Attach the disk to the 3-step pulley. Attach a string to the underside of the hub. Attach the Ultra Pulley to the Rotary Motion Sensor using the Ultra Pulley Swivel Mount. Run the string over the Ultra Pulley and attach a weight to the end of the string. Use the weight to apply a torque to the system while the Rotary Motion Sensor measures the angular acceleration.
Moment of Inertia of Point Masses
(requires Rotational Motion Accessory Kit, see Accessories section)
Use the same set up as described in the previous section. This time attach a rod with two masses to the 3-step pulley. Use the weight to apply a torque to the system while the Rotary Motion Sensor measures the angular acceleration.
Conservation of Angular Momentum
(requires Rotational Motion Accessory Kit, see Accessories section)
Attach the disk to the 3-step pulley. Give the disk a spin. While the system is rotating, drop a second disk onto the first disk. Observe the change in the angular velocity before and after the mass is added to the system.
Motion of a Physical Pendulum
(requires Rotational Motion Accessory Kit, see Accessories section)
Attach the 3-step pulley to the Rotary Motion Sensor with the small step next to the sensor body. Attach the center of the rod with two masses to the pulley. Position the masses so they are not symmetric. Position the sensor so the face of the pulley is vertical. Start the pendulum swinging, and determine the angular acceleration as a function of the angle.
Configuring the Sensor
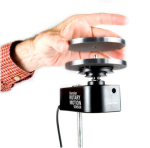
The 3-step pulley can be mounted on the rotating shaft in either of two orientations: with the wide side of the pulley near the sensor body, or with the narrow side of the pulley near the sensor body. The easiest way to insert the
3-step pulley on the Rotary Motion Sensor shaft is hold the shaft to prevent rotation as you turn the pulley to align the key to the slot. The o-ring can be slipped over the outer pulley to increase friction when the pulley is in contact with a surface.
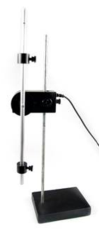
The thumb screw can be threaded into the back of the sensor allowing the Rotary Motion Sensor to be attached to a ring stand.
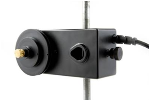
The sensor also has a set of accessory mounting holes which allow it to connect to existing accessories.
Specifications
|
Resolution |
1° or 0.25° 1 |
|
Maximum speed |
30 rev/s at 1° resolution 7.5 rev/s at 0.25° resolution |
|
3-step pulley |
10 mm, 29 mm and 48 mm groove diameter |
Note: High resolution mode is also known as X4 mode. When active, the sensor has a 0.25 degree resolution and a limited maximum measurable rotational velocity.
Care and Maintenance
Do not wrap the cable tightly around the sensor for storage. Repeatedly doing so can irreparably damage the wires and is not covered under warranty.
How the Sensor Works
The Rotary Motion Sensor uses a quadrature optical (incremental type) encoder to measure the amount and direction of rotation. The encoder, which is attached to the rotating sensor shaft, consists of a coded pattern of opaque and transparent sectors. The quadrature encoder produces two pulse output patterns 90° apart in phase. The position of the shaft is determined by counting the pulses. The phase relationship between the output signals determines the direction of rotation.
Troubleshooting
For troubleshooting and FAQs, see www.vernier.com/til/1439
Repair Information
If you have watched the related product video(s), followed the troubleshooting steps, and are still having trouble with your Rotary Motion Sensor, contact Vernier Technical Support at support@vernier.com or call 888-837-6437. Support specialists will work with you to determine if the unit needs to be sent in for repair. At that time, a Return Merchandise Authorization (RMA) number will be issued and instructions will be communicated on how to return the unit for repair.
Accessories
| Item | Order Code |
|---|---|
|
AK-RMV |
|
|
MK-RMV |
Warranty
Warranty information for this product can be found on the Support tab at www.vernier.com/rmv-btd/#support
General warranty information can be found at www.vernier.com/warranty
Disposal
When disposing of this electronic product, do not treat it as household waste. Its disposal is subject to regulations that vary by country and region. This item should be given to an applicable collection point for the recycling of electrical and electronic equipment. By ensuring that this product is disposed of correctly, you help prevent potential negative consequences on human health or on the environment. The recycling of materials will help to conserve natural resources. For more detailed information about recycling this product, contact your local city office or your disposal service.
 The symbol, shown here, indicates that this product must not be disposed of in a standard waste container.
Contact Support
Fill out our online support form or call us toll-free at 1-888-837-6437.