Time of Flight Pad User Manual
Order Code: TOF-VPL
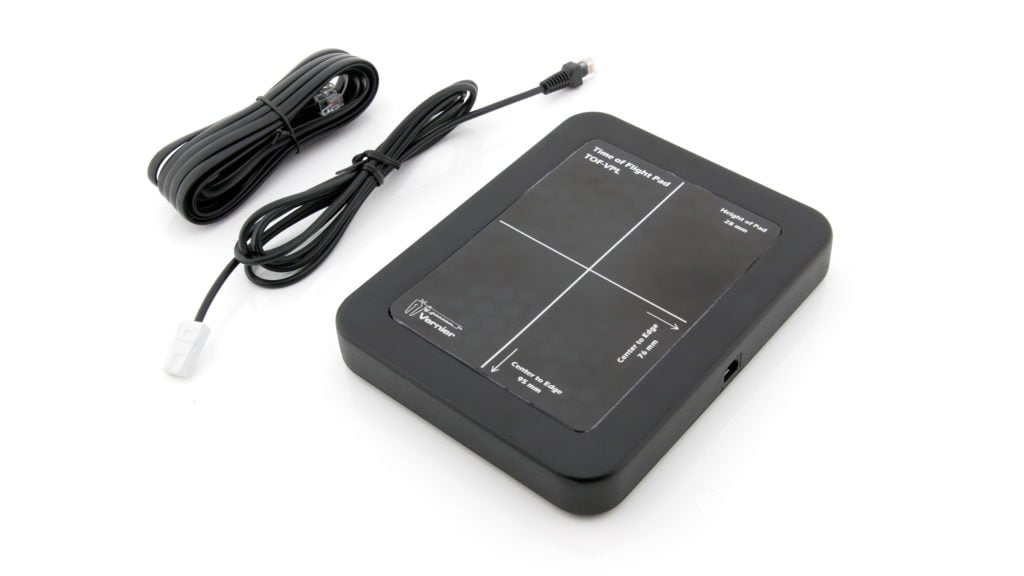
The Time of Flight Pad is an accessory timing device for use with the Go Direct® Projectile Launcher (GDX-PL) or the Vernier Projectile Launcher (VPL). The standard experiment performed with the Time of Flight Pad is the measurement of the time interval taken by a projectile from the moment of launch to the moment of landing—in other words, the time of flight.
In addition to working with a projectile launcher, the Time of Flight Pad can be used daisy-chained to a Vernier Photogate (VPG-BTD) or Go Direct Photogate (GDX-VPG). Connecting to a Go Direct Photogate requires a separate cable (TOF-CB-GDX) not included with the Time of Flight Pad. You can also connect the Time of Flight Pad directly to a digital port on a supported interface for using the pad as an independent sensor. In this situation, the Time of Flight Pad is identified by the software as a photogate.
Note: Vernier products are designed for educational use. Our products are not designed nor recommended for any industrial, medical, or commercial process such as life support, patient diagnosis, control of a manufacturing process, or industrial testing of any kind.
What’s Included
- Time of Flight Pad
- 4 meter projectile launcher cable
- 1.2 meter photogate cable
Compatible Software
Choose a platform below to see its compatibility requirements.LabQuest
Interface LabQuest App LabQuest 3 Full support LabQuest 2 Full support LabQuest Full support Computers
Software Interface Graphical Analysis Graphical Analysis (Web App) Logger Pro (discontinued) LabQuest Mini Full support Full support Full support LabQuest 3 Full support Full support Full support LabQuest 2 Full support Full support Full support LabQuest Stream Full support 1 Full support 1 Partial support 2 LabQuest Full support Full support Full support LabPro Incompatible Incompatible Full support Compatibility Notes
Chromebook
Software Interface Graphical Analysis (Web App) LabQuest Mini Full support LabQuest 3 Full support LabQuest 2 Full support LabQuest Stream Full support 1 LabQuest Full support Compatibility Notes
iOS
Software Interface Graphical Analysis Graphical Analysis GW LabQuest Stream Full support Incompatible LabQuest 3 Full support 1 Full support 1 LabQuest 2 Full support 1 Full support 1 Compatibility Notes
Android
Software Interface Graphical Analysis Graphical Analysis GW LabQuest Stream Full support Incompatible LabQuest 3 Full support 1 Full support 1 LabQuest 2 Full support 1 Full support 1 Compatibility Notes
Arduino
Software Interface Arduino Vernier Arduino® Interface Shield Full support 1 Compatibility Notes
LabVIEW
Software Interface NI LabVIEW SensorDAQ Full support Vernier myDAQ Adapter Full support 1 LabQuest Mini Full support LabQuest Stream Full support LabQuest 3 Full support LabQuest 2 Full support LabQuest Full support Compatibility Notes
Texas Instruments
Software Interface EasyData DataMate DataQuest TI-Nspire Software CBL 2 Full support 1 Full support 1 2 3 Incompatible Incompatible LabPro Full support 1 Full support 1 2 3 Incompatible Incompatible TI-Nspire Lab Cradle Incompatible Incompatible Full support Full support Compatibility Notes
When the Time of Flight Pad is used with a projectile launcher or daisy-chained to a photogate, the compatible software depends on sensor and interface to which it is connected.
- For Go Direct Projectile Launcher, see www.vernier.com/manuals/gdx-pl
- For Vernier Projectile Launcher, see www.vernier.com/manuals/vpl
- For Go Direct Photogate, see www.vernier.com/manuals/gdx-vpg
- For Vernier Photogate, see www.vernier.com/manuals/vpg-btd
Getting Started
Follow these steps when using the Time of Flight Pad with a projectile launcher.
- Connect the included 4 meter projectile launcher cable to the Time of Flight Pad.
- Connect the other end of the cable to the Accessories (or Ext. Switch) port on the projectile launcher.
- Follow the instructions for connecting a projectile launcher:
- For the Go Direct Projectile Launcher, see www.vernier.com/til/5770
- For the Vernier Projectile Launcher, see www.vernier.com/til/5961
- Adjust the data-collection parameters to indicate you are using the Time of Flight Pad. You are now ready to collect data.
Using the Product
Using the Time of Flight Pad with a Projectile Launcher
Connect the Time of Flight Pad and projectile launcher following the steps in the Getting Started section of this user manual. Since the launcher does not automatically detect the Time of Flight Pad, it is necessary that you modify the data-collection settings to indicate that you are using the Time of Flight Pad.
Position the Time of Flight Pad so that the projectile will land near the center of the pad. Projectiles that land near the edges of the pad may not be detected. Start data collection and launch the projectile.
Compare the reported time of flight to the expected value calculated using elementary kinematics. To make this calculation, you will need to know the launch velocity, angle and speed, as well as the height difference between the projectile’s initial launch height and the height of the surface of the Time of Flight Pad. The top surface of the Time of Flight Pad is 2.7 cm above the bottom surface.
Using the Time of Flight Pad as a standalone sensor connected to an interface
The Time of Flight Pad can be connected to a supported interface. Follow these steps to get connected:
- Connect the included photogate cable to the Time of Flight Pad.
- Connect the other end of the cable to the digital port of a supported interface.
- For platform and interface-specific connection instructions, see www.vernier.com/start/tof-vpl
- Adjust the photogate settings as needed to match the experiment you are doing.
The Time of Flight Pad identifies as a photogate and can be used in timing experiments that utilize time between gates or pulse timing modes. Most often you would use the Time of Flight Pad with a photogate to measure the time from passing through the photogate until the Time of Flight Pad is struck.
Using the Time of Flight Pad daisy-chained to a Vernier Photogate
Whenever possible, use the Time of Flight Pad connected directly to a supported interface. If your interface does not have an available digital port, you can daisy-chain the Time of Flight Pad to a photogate that is already connected to the interface. Follow these steps to get connected:
- Connect the included photogate cable to the Time of Flight Pad.
- Connect the other end of the cable to the daisy-chain port on a Vernier Photogate.
- Connect the Vernier Photogate to the digital port of a supported interface.
- For platform and interface-specific connection instructions for the photogate, see www.vernier.com/start/vpg-btd
- Adjust the photogate settings as needed to match the experiment you are doing.
The Time of Flight Pad data will come in the same column as the daisy-chained photogate. This configuration can utilize time between gates or pulse timing modes. Most often you would use the Time of Flight Pad with a photogate to measure the time from passing through the photogate until the Time of Flight Pad is struck.
Using the Time of Flight Pad daisy-chained to Vernier Go Direct Photogate
You would use the Time of Flight Pad with Go Direct Photogate to replicate projectile experiments without the need for a projectile launcher. This configuration requires the Go Direct Time of Flight Pad cable (TOF-CB-GDX). This cable is sold separately and does not come with either the Go Direct Photogate or the Time of Flight Pad.
Follow these instructions to get connected:
- Connect the Go Direct Time of Flight Pad cable to the Time of Flight Pad.
- Connect the other end of the cable to the daisy-chain port on the Go Direct Photogate.
- For platform-specific instructions for connecting Go Direct Photogate, see www.vernier.com/start/gdx-vpg
- Adjust the selected sensor channels so that both the Object Velocity and Gate 1/Remote Gate – Timing channels are active.
Position Go Direct Photogate so that the projectile will pass through Go Direct Photogate’s Gate 1 before Gate 2 as it is launched. This will ensure the projectile speed is reported as a positive value and that the correct value for time of flight is reported.
Safety
When using the Time of Flight Pad with a projectile launcher, we recommend students and instructors wear goggles at all times, including anyone in the vicinity of the projectile launch and landing areas.
The launching system of the projectile launcher requires simultaneous engagement of the “Arm” and “Launch” buttons to prevent accidental launches. Do not attempt to override or disable this feature.
Other safety considerations
- Do not put your face, hands, or other body parts near the end of the launch chamber while launching.
- Do not aim the launcher at a person or animal.
- Only apply pressure to the launcher using the pump provided.
- Do not exceed 150 psi when pressurizing the launch chamber.
Care and Maintenance
Do not store the Time of Flight Pad with any object compressing the pad. This could damage the pad by making it unable to compress properly when struck by an object during normal use.
How the Product Works
The Time of Flight Pad functions as an electrical switch to provide timing information. When a projectile strikes the surface of the Time of Flight Pad, a circuit is closed and that action is recorded by the software as a blocking event.
The Time of Flight Pad uses a timer to subsequently report an unblocking event about one second after the pad is struck. This time does not depend on how long the pad is compressed.
Sample Experiments
Here are a couple of additional experiments you can do using the Time of Flight Pad with a projectile launcher.
Constant Time of Flight for a Horizontally Projected Object
Set the Projectile Launcher to fire horizontally. How will the time to strike the floor vary with launch speed? Collect time of flight data for various launch speeds. Collect multiple trials for each speed to estimate the variations in the measurements.
Use Launch Angle and Speed to Predict Landing Position
Set the Projectile Launcher to a convenient launch angle. Fire and capture the projectile before it hits the floor in order to determine the launch speed. From the launch speed and angle, as well as the height of the launch point above the Time of Flight Pad surface, calculate where the projectile will land. Place the Time of Flight Pad in this location. Predict the time of flight for the projectile. Finally, fire the projectile, allowing it to fly to the Time of Flight Pad for the first time. Compare the measured time of flight and actual landing position to your predictions. Repeat for additional launch speeds and angles.
Troubleshooting
For troubleshooting and FAQs, see www.vernier.com/til/3300
Repair Information
If you have followed the troubleshooting steps and are still having trouble with your Time of Flight Pad, contact Vernier Technical Support at support@vernier.com or call 888-837-6437. Support specialists will work with you to determine if the unit needs to be sent in for repair. At that time, a Return Merchandise Authorization (RMA) number will be issued and instructions will be communicated on how to return the unit for repair.
Accessories/Replacements
|
Item |
Order Code |
|---|---|
|
GDX-PL |
|
|
VPL |
|
|
PS-VPL |
|
|
PG-BTD |
|
|
EXT-BTD |
|
|
Go Direct Time of Flight Pad Cable
|
TOF-CB-GDX |
Warranty
Warranty information for this product can be found on the Support tab at www.vernier.com/tof-vpl/#support
General warranty information can be found at www.vernier.com/warranty
Contact Support
Fill out our online support form or call us toll-free at 1-888-837-6437.